Steadi-Plank™ install and set-up on vessel
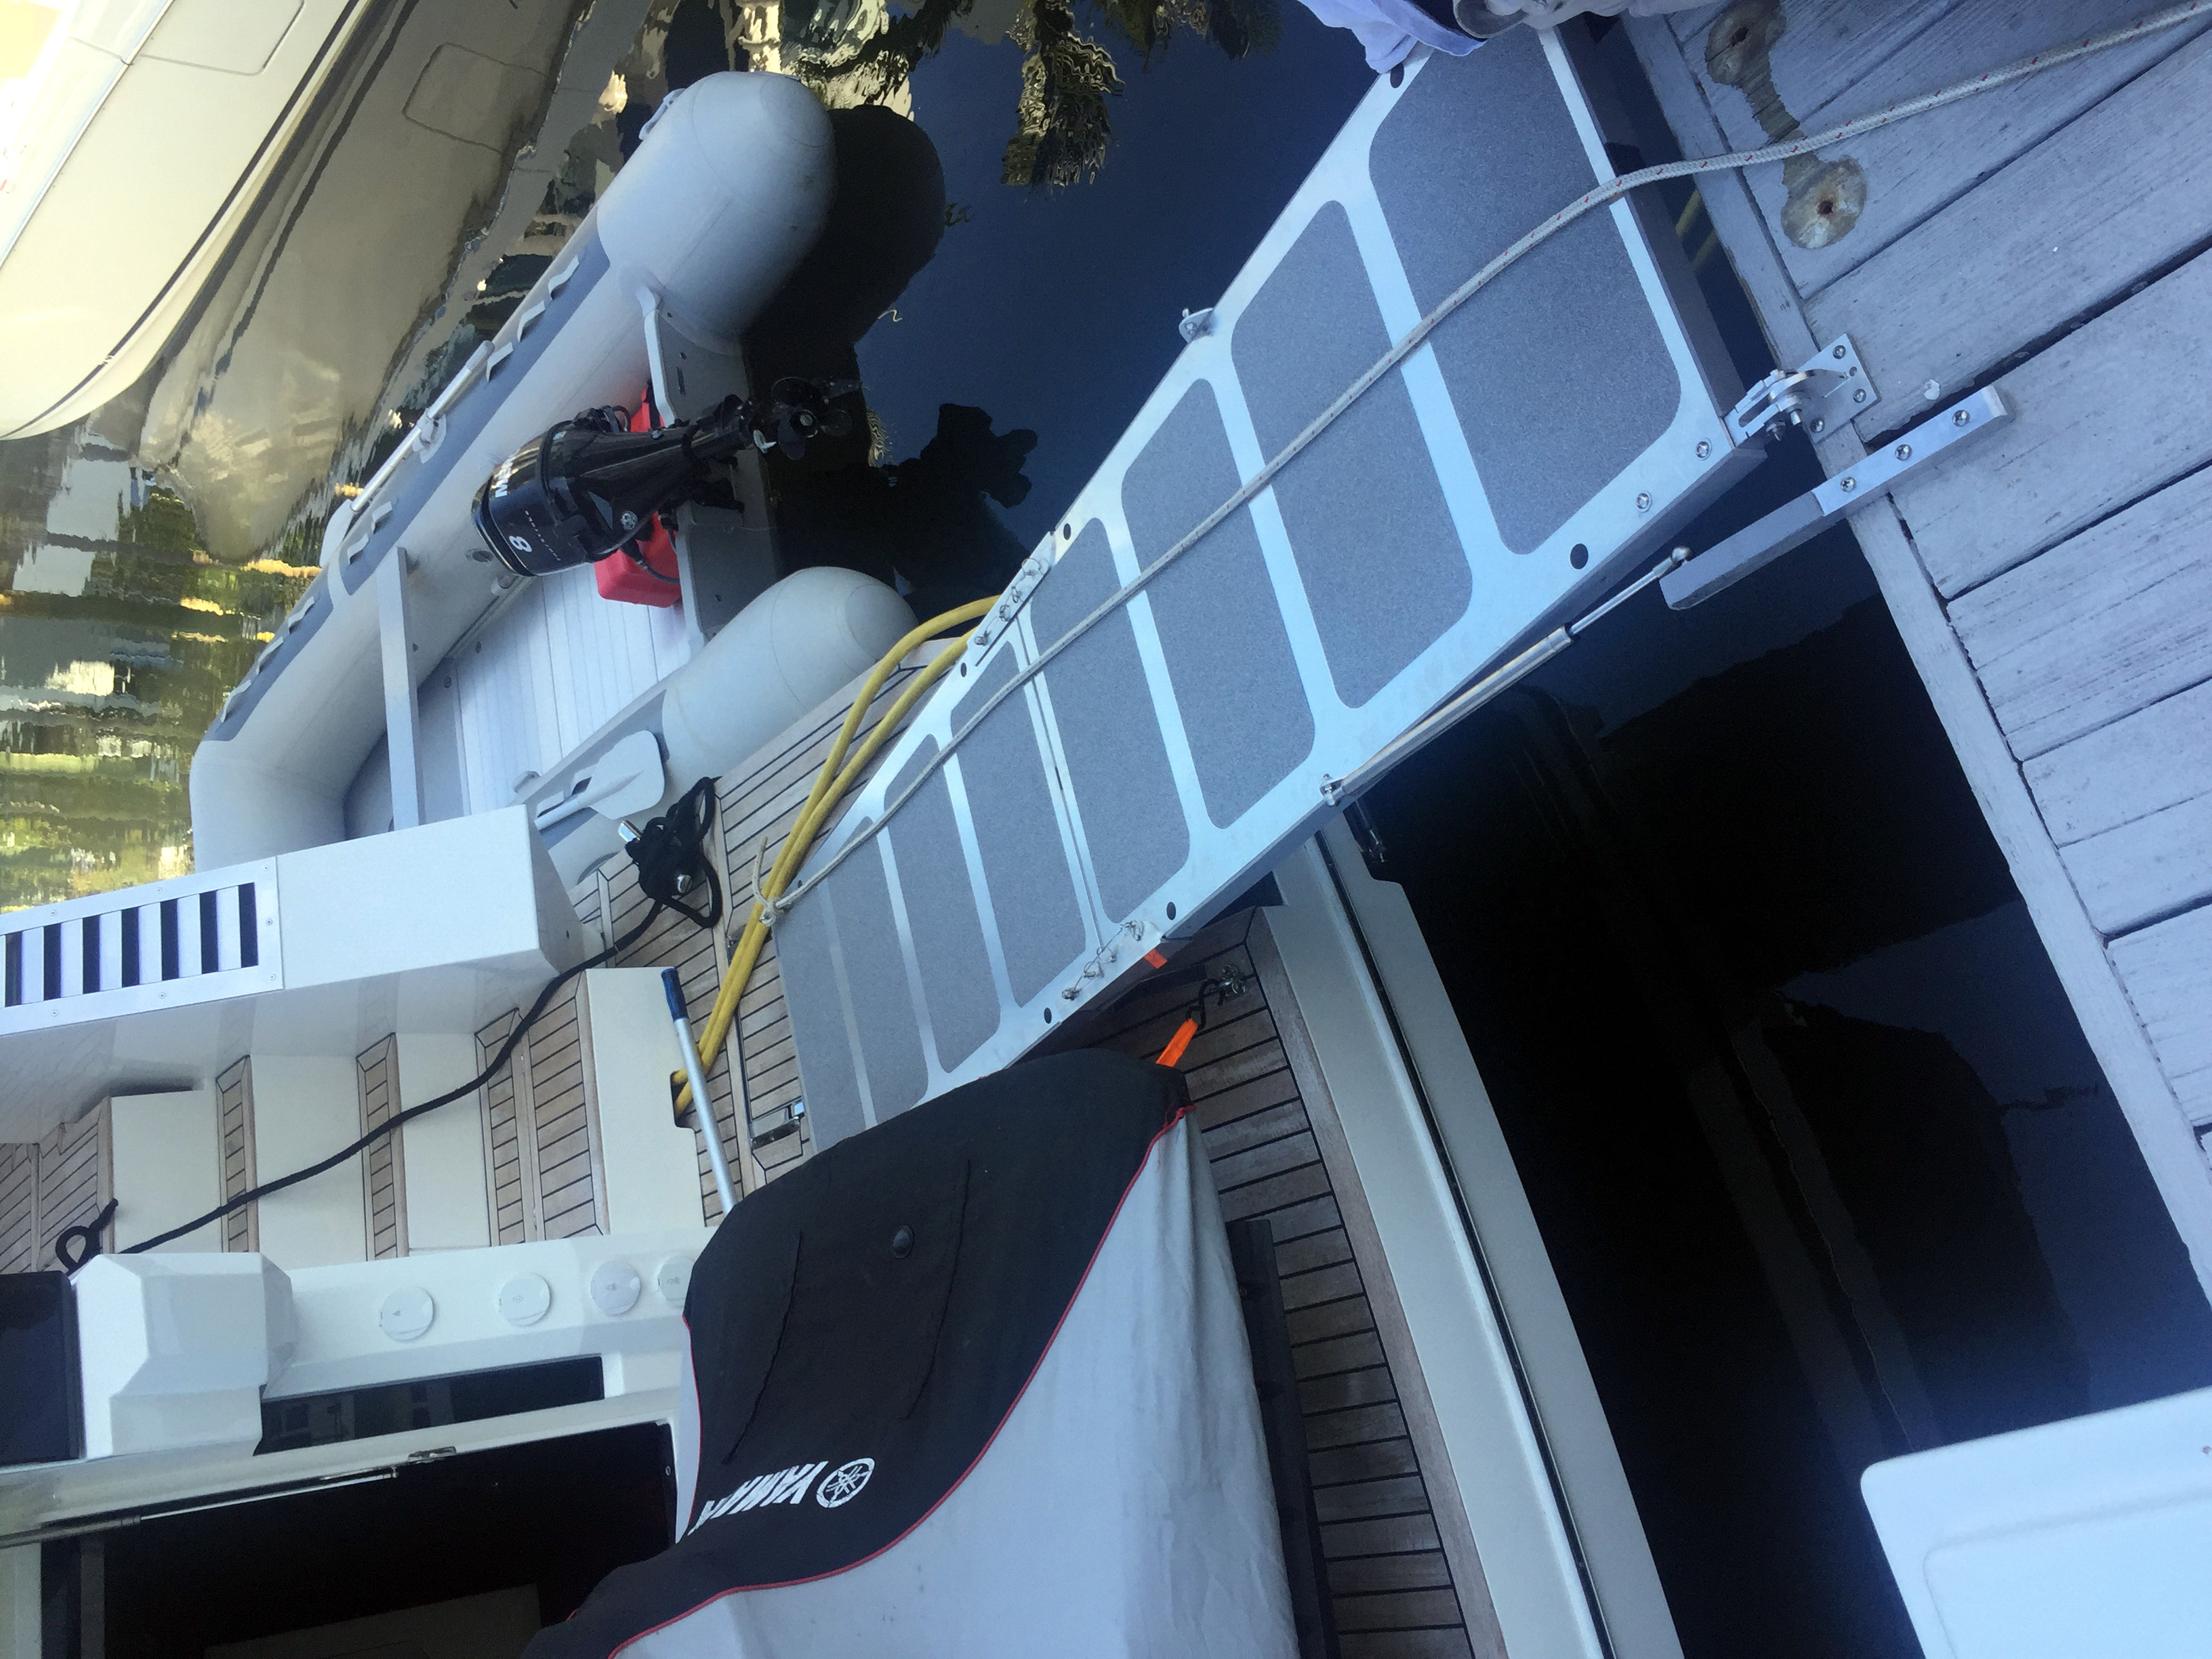
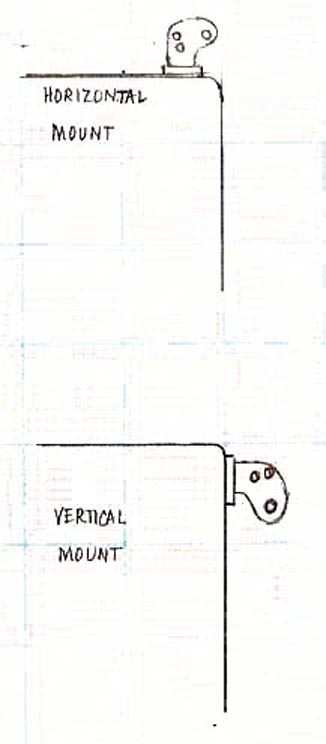
1. Determine the ramp mounting location(s) on your vessel. Make sure that the ramp will be able to move vertically up and down with the change in elevation between the vessel and dock or fixed structure. We also recommend that you keep the mounts horizontally level even if the vessel may not be. Most docks and other fixed boarding areas are horizontally level and this will allow the ramp to better rest on these structures. The Cam Mounts may be mounted horizontally on top of the deck / Gunnels/ Transom / swim platform or vertically on the side of the vessel / transom. (The mounts should be set at 22-3/8" apart on center) If mounted on the side of the vessel, try to set the mounts in a horizontal position that is parallel to the average dock you will be going to. This will allow the ramp to lay flush on the dock. Our ramps are not designed to be cantilevered. They must be supported at both ends either with one of our mounting systems or be resting on a surface.

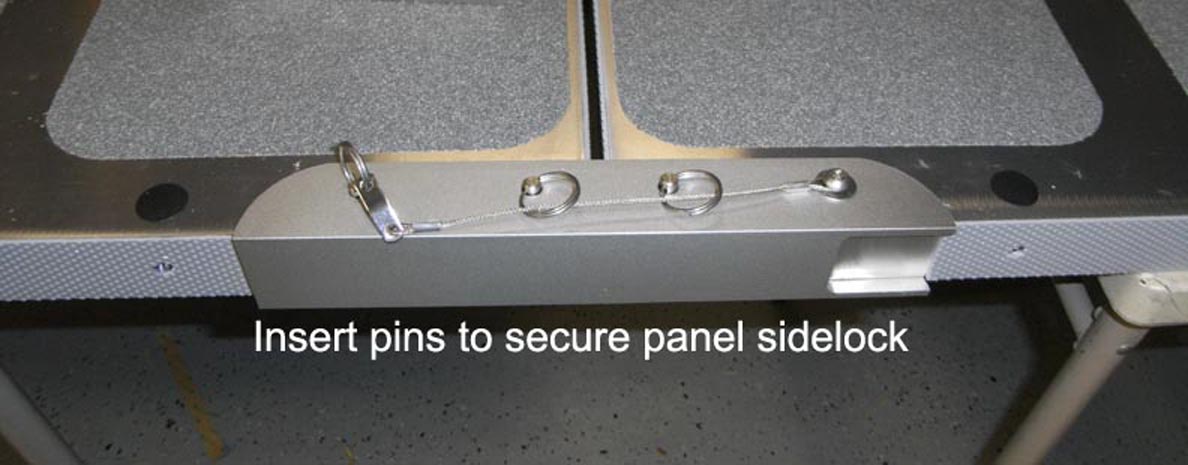
NOTE: The ramp forks with the side slide lock are designed to have the tips of the slide locks break if the non-mounted end of the ramp slides off of the support that it rest on and hits up against something or is pinned between objects. This is designed to help prevent damage to the surface that the ramp is mounted to. The side slide locks are replaceable.
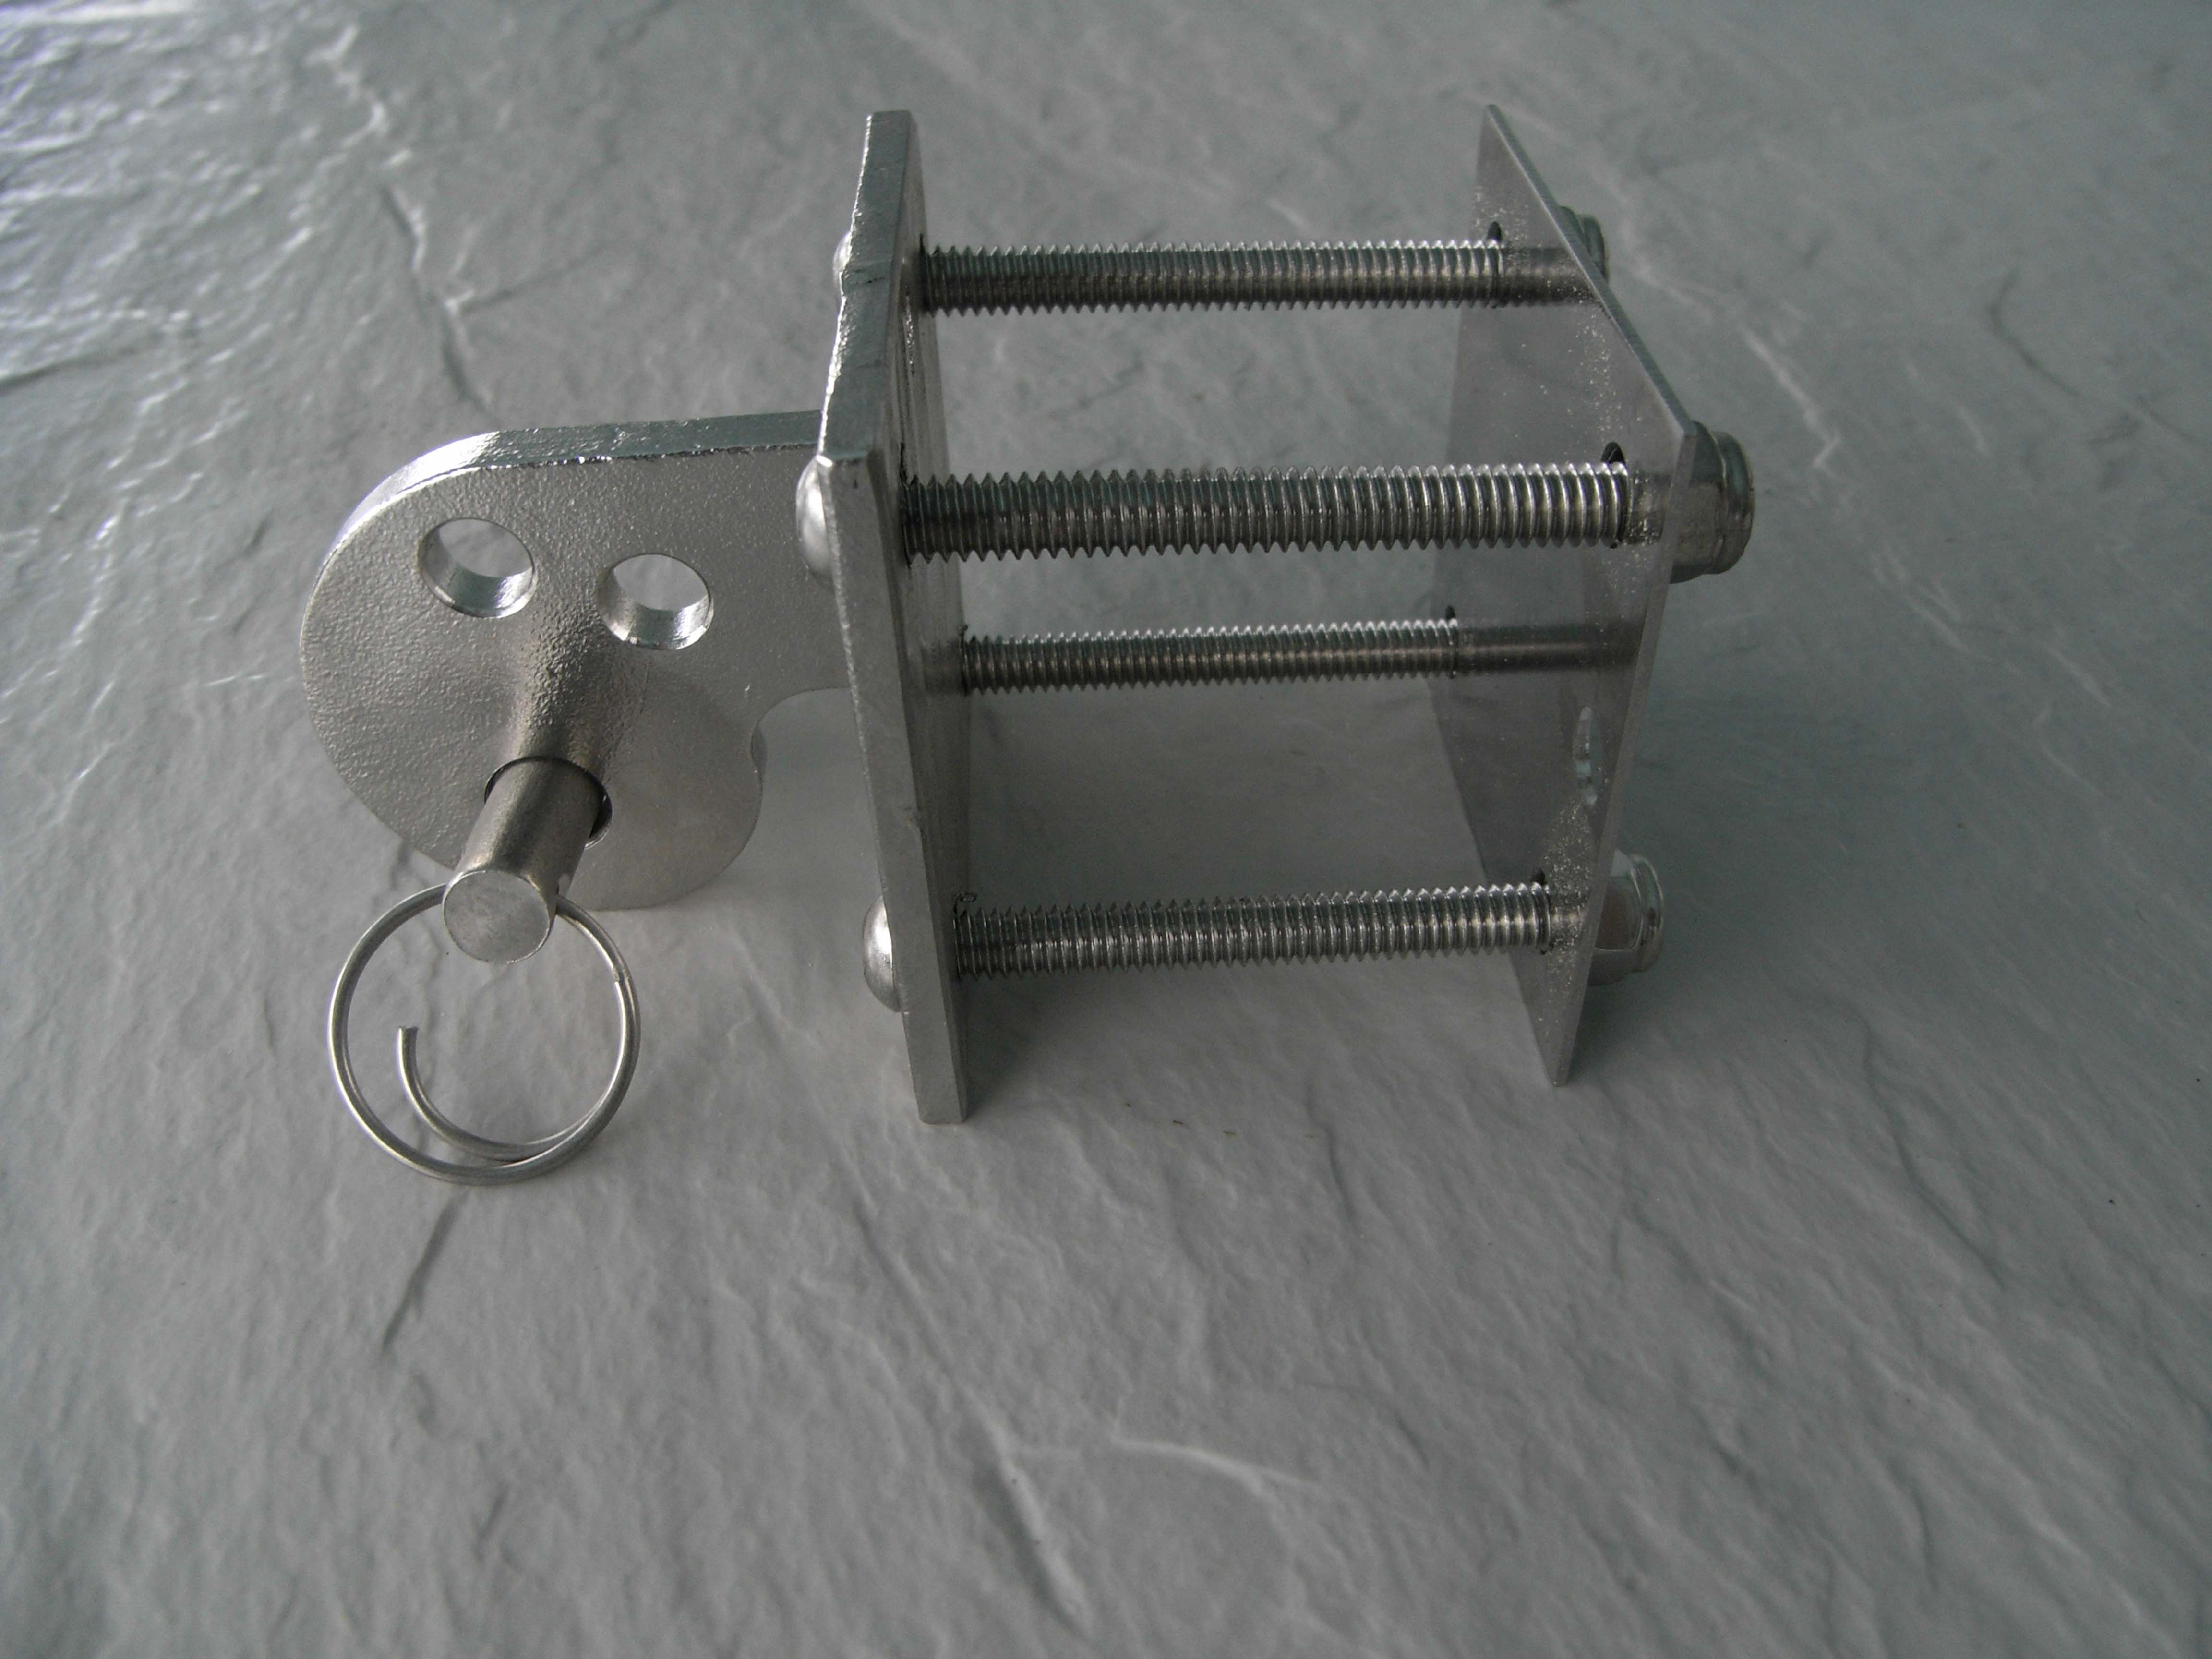
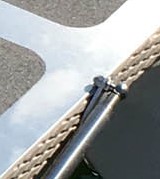
When using our rail mount system with the 3/8” stainless steel rod, make sure that you use the stainless steel flat washer between the end ring and the cam mount to help prevent the ring from pulling thru the mount.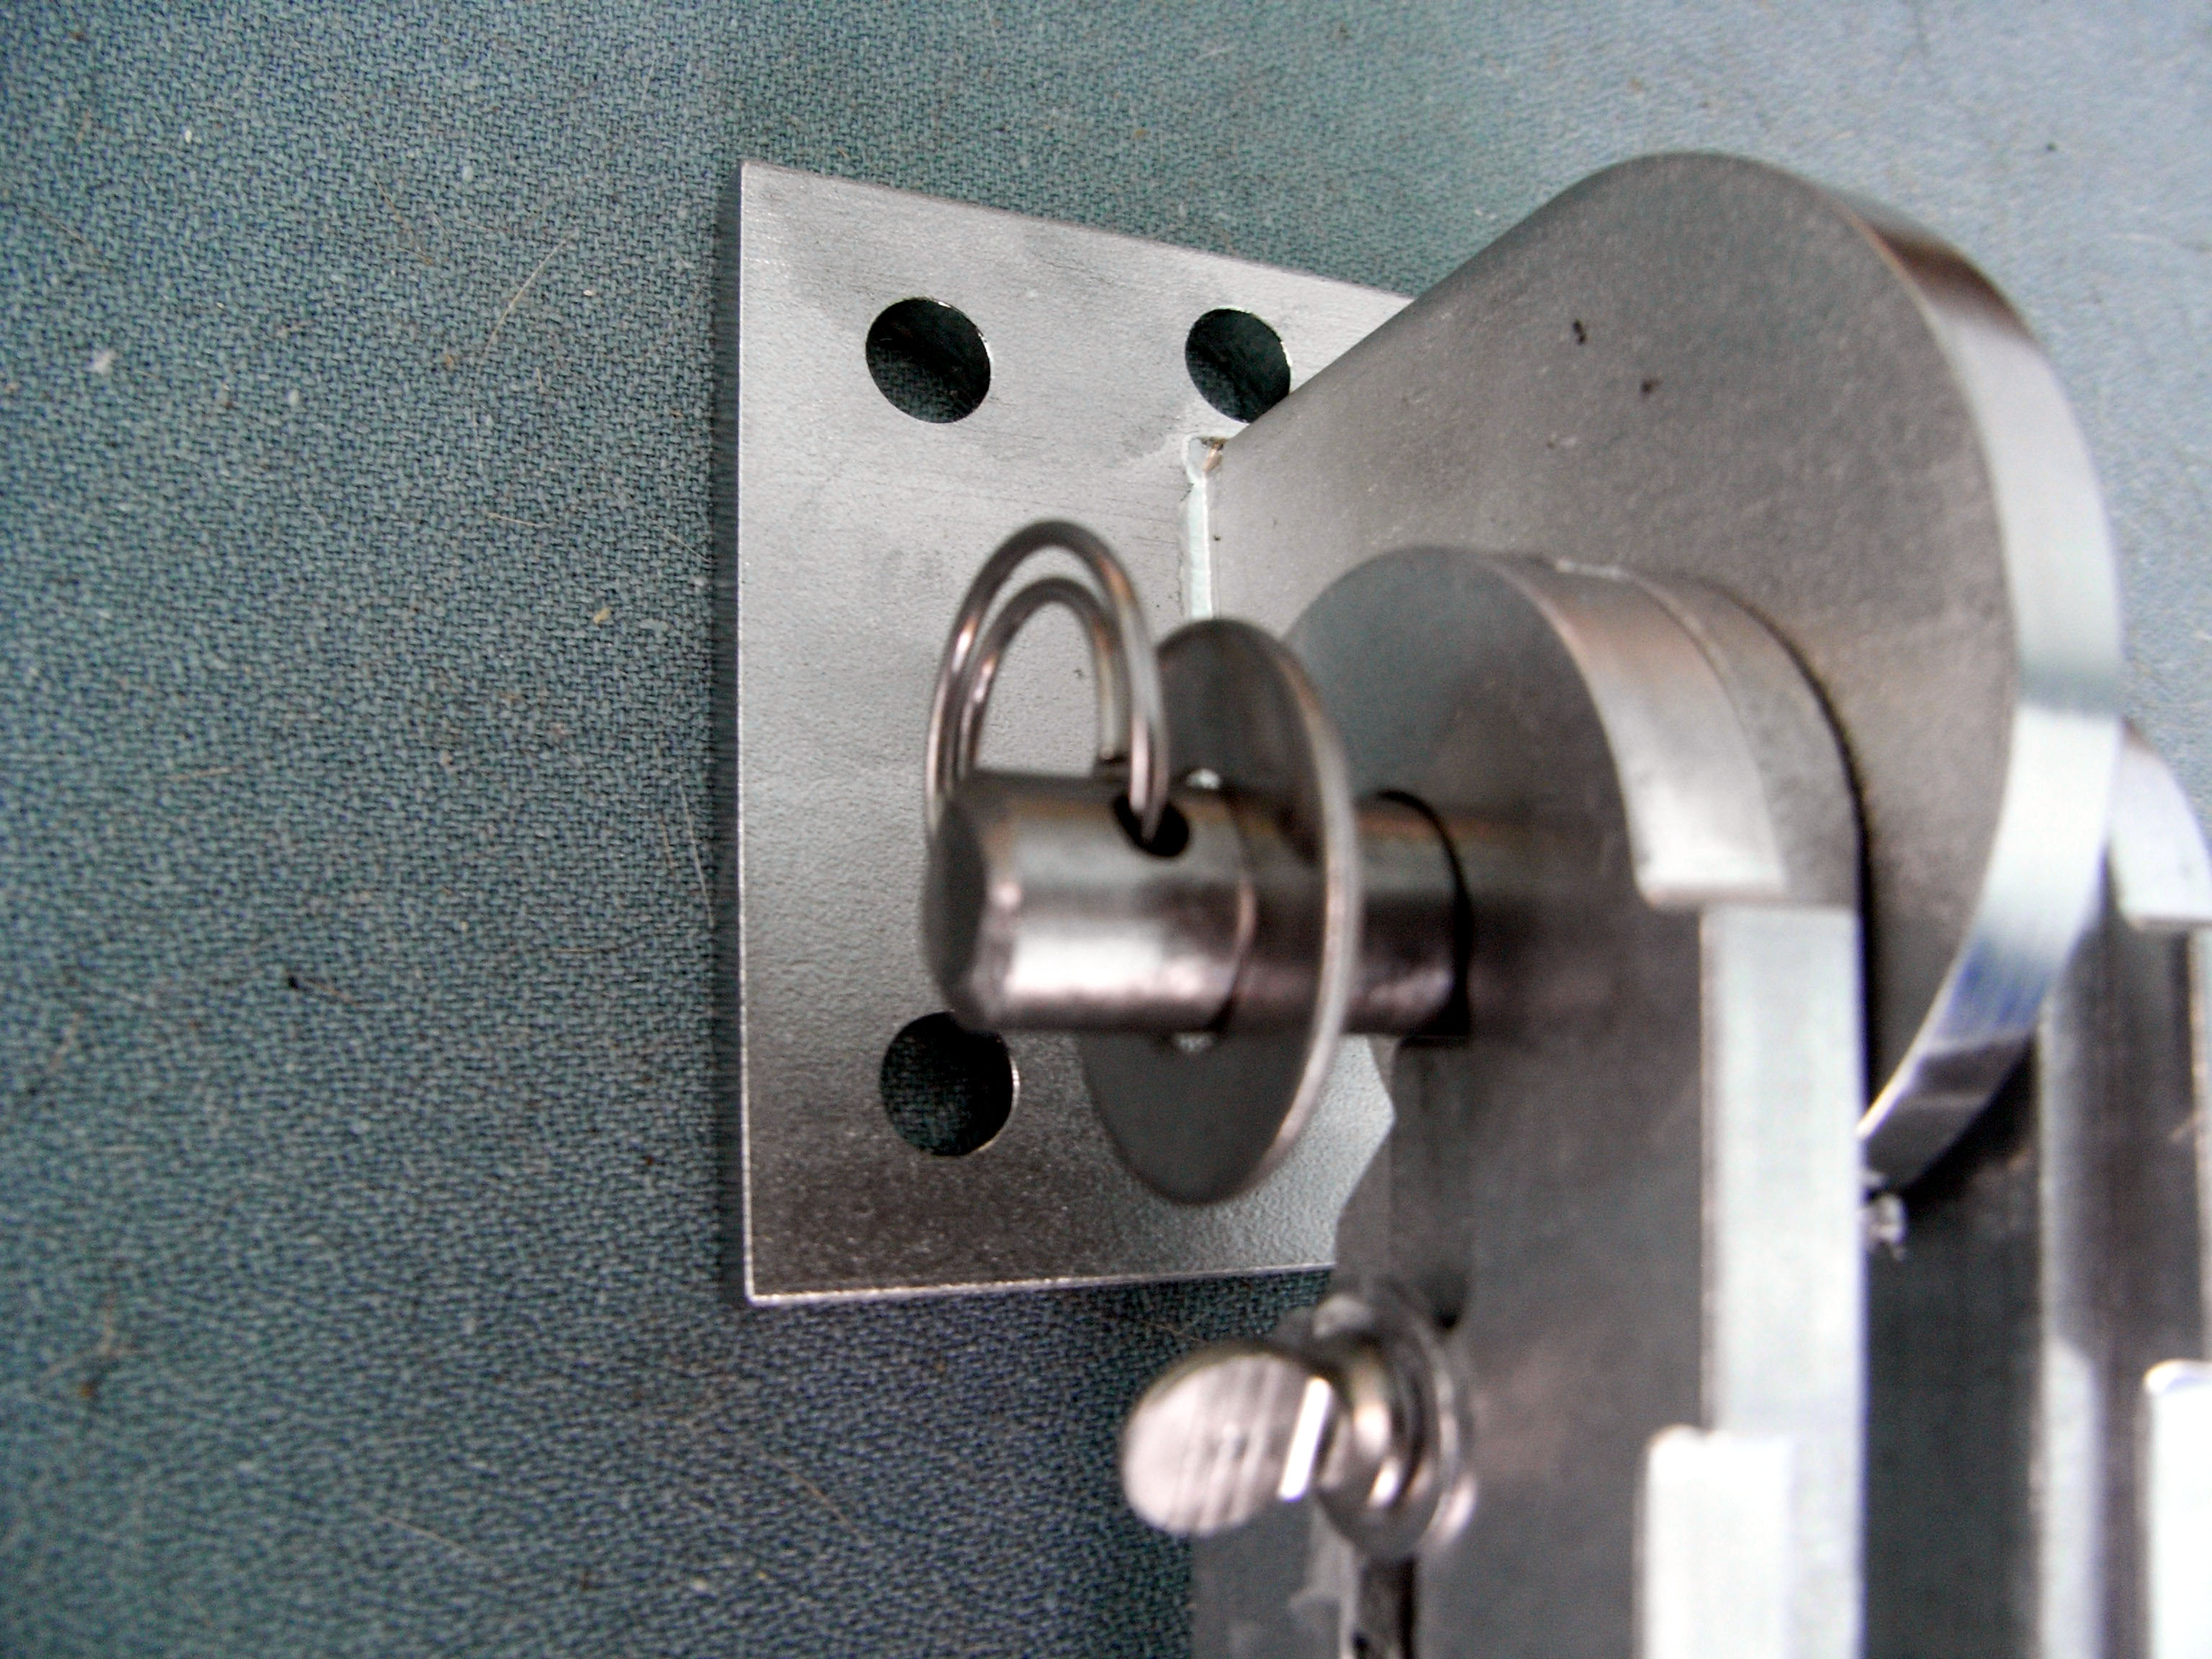
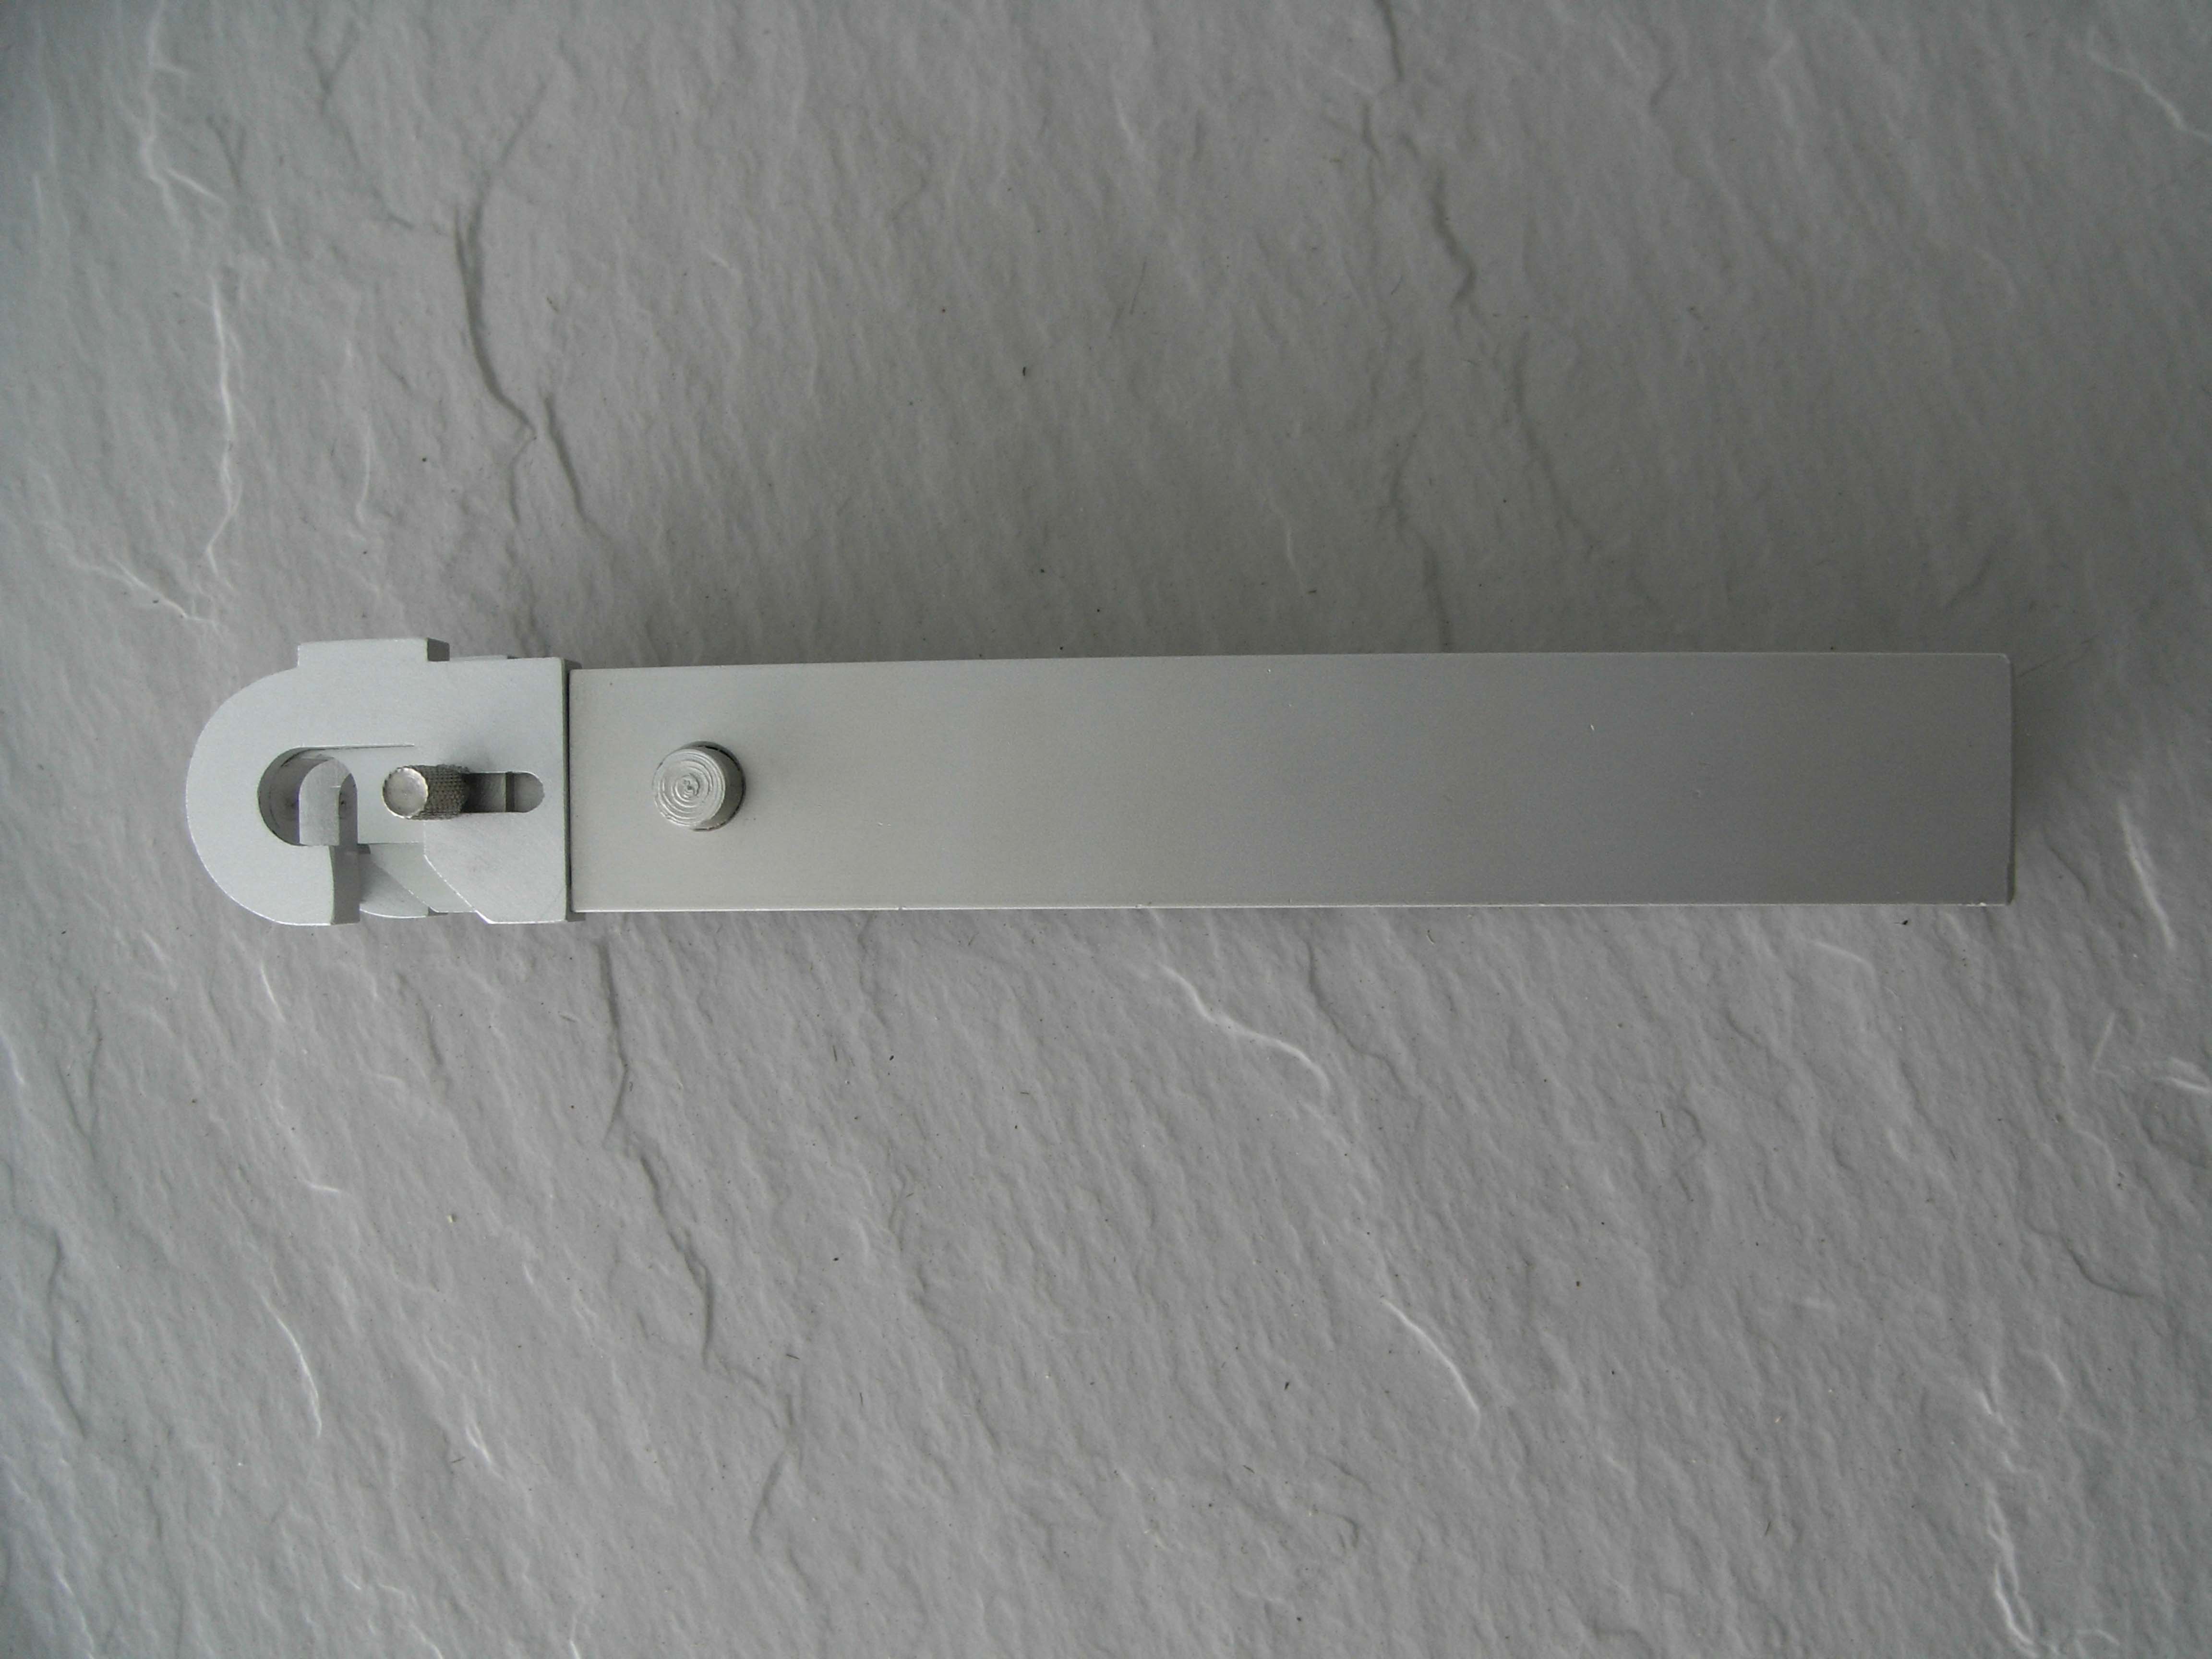
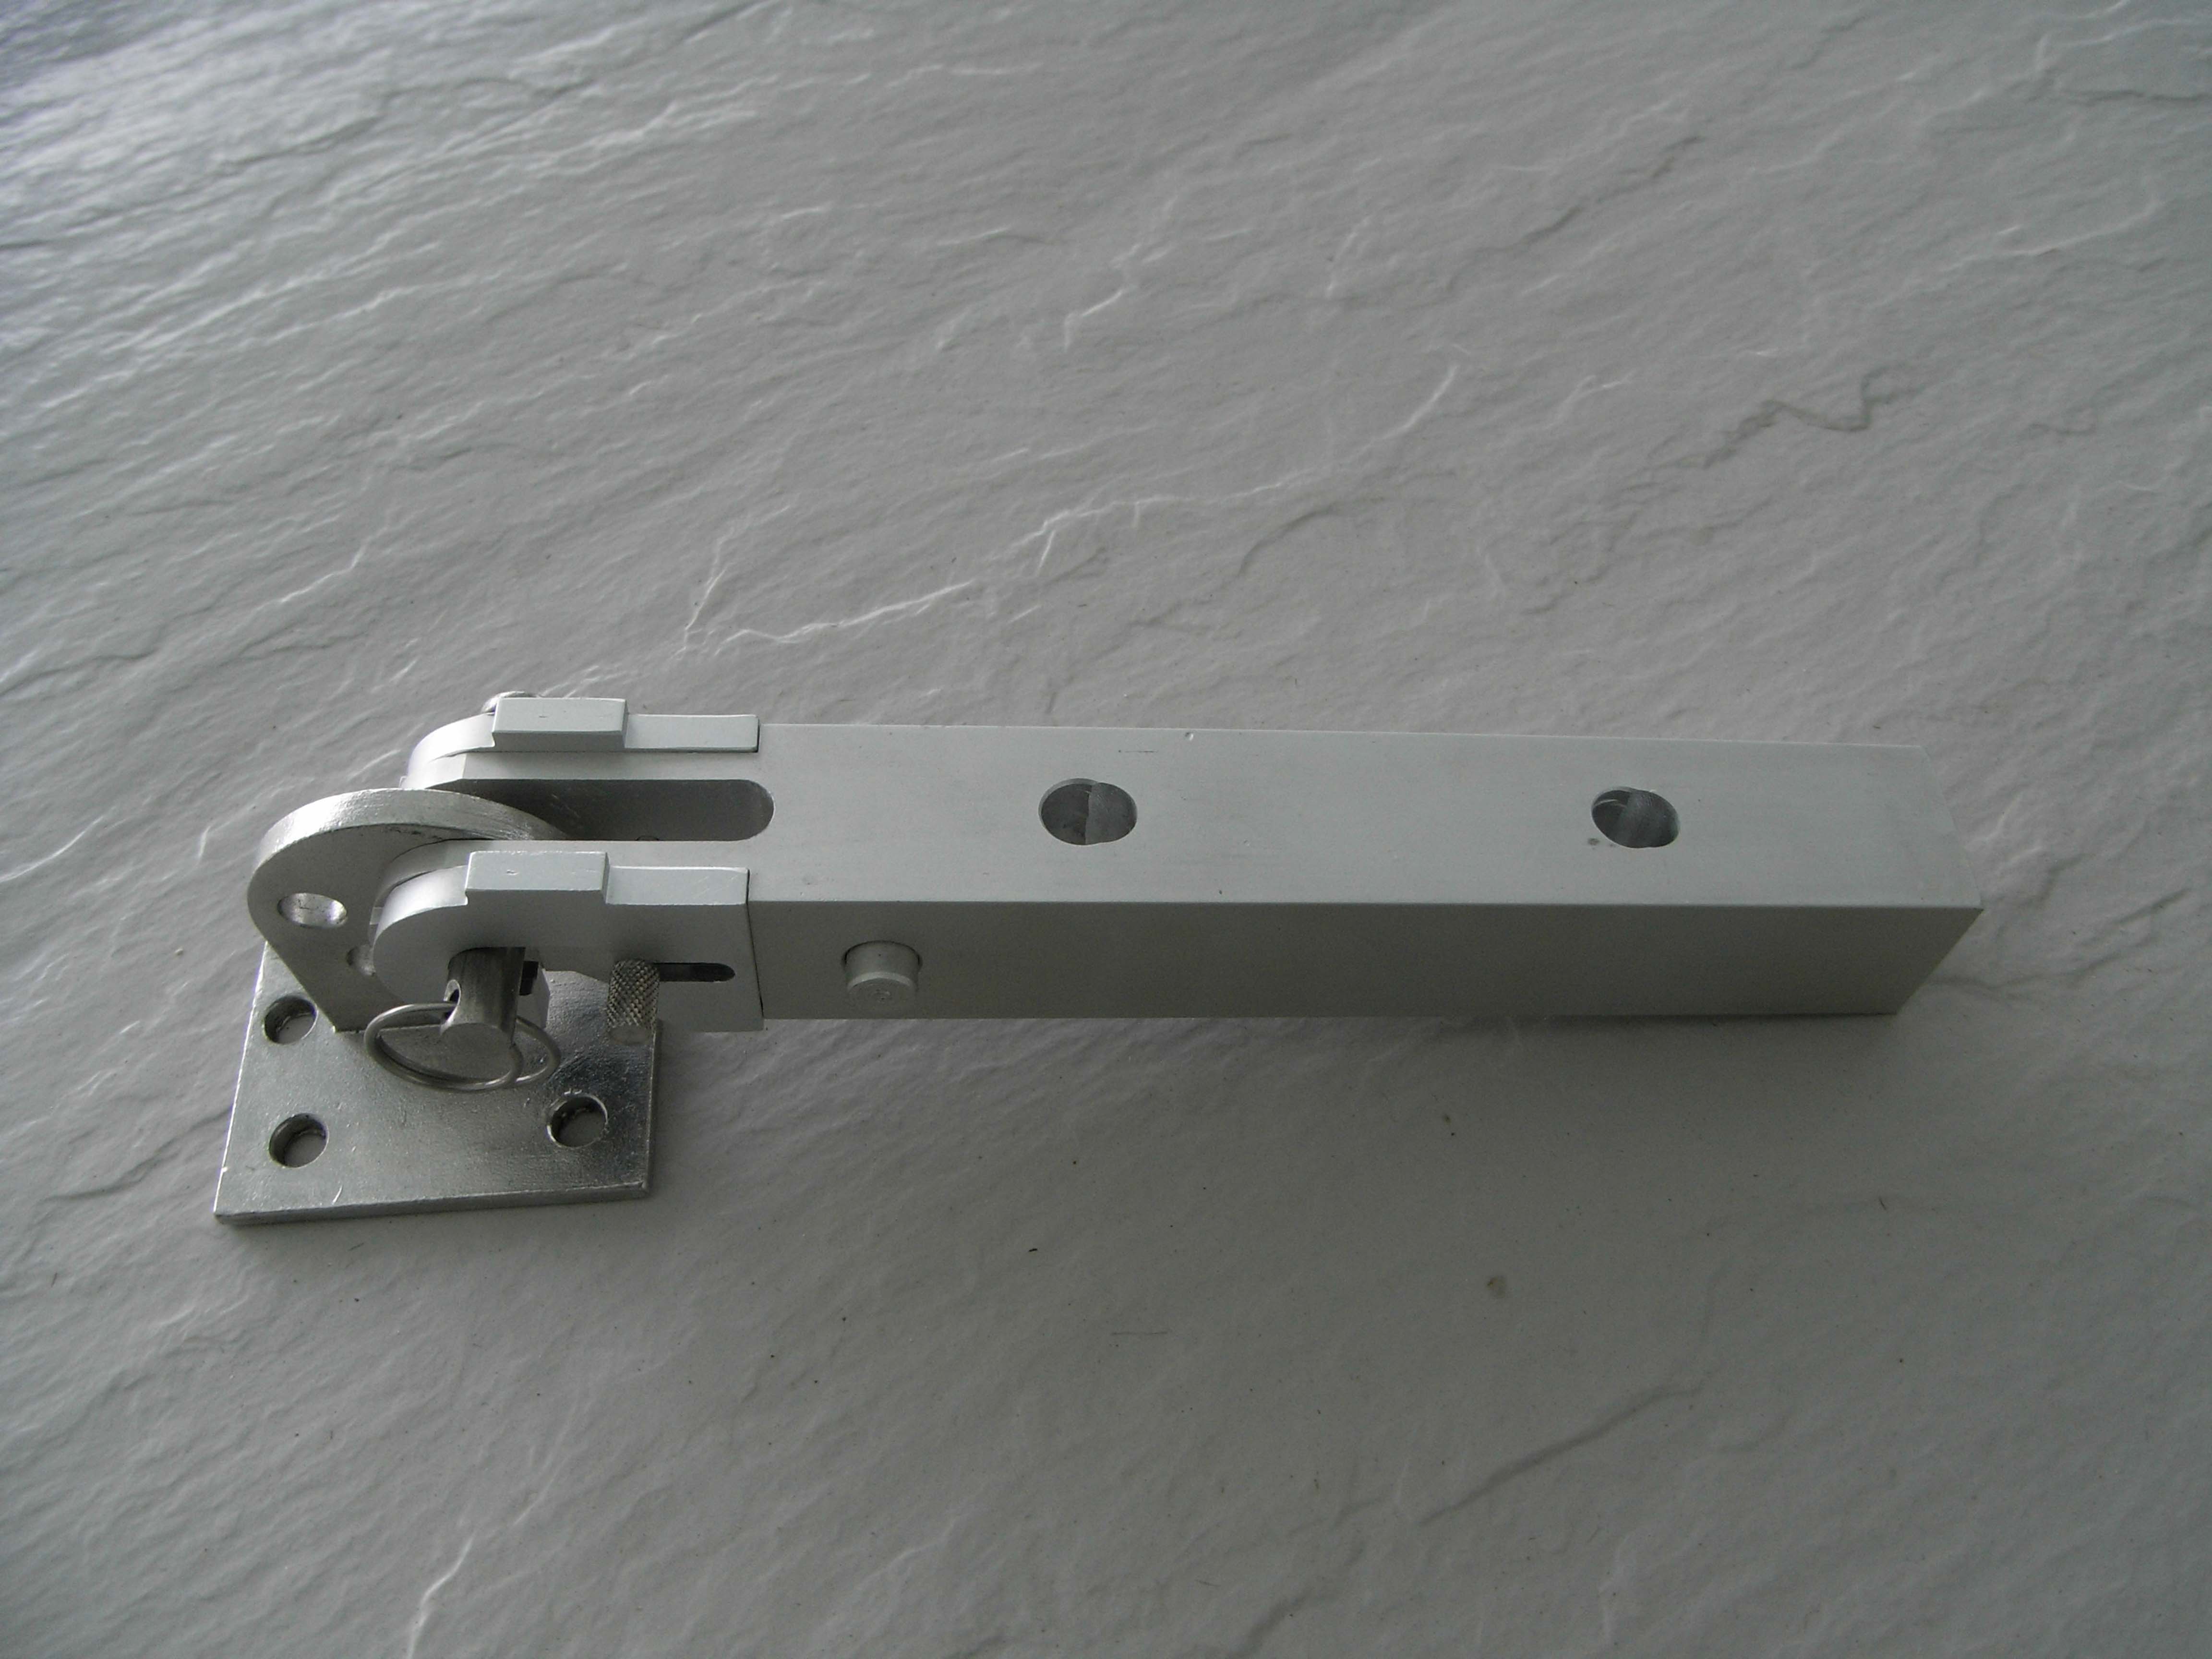
 The ramp forks with the side slide lock are designed to have the tips of the slide locks break if the non-mounted end of the ramp slides off of the support that it rest on and hits up against something or is pinned between objects. This is designed to help prevent damage to the surface that the ramp is mounted to. The side slide locks are replaceable.
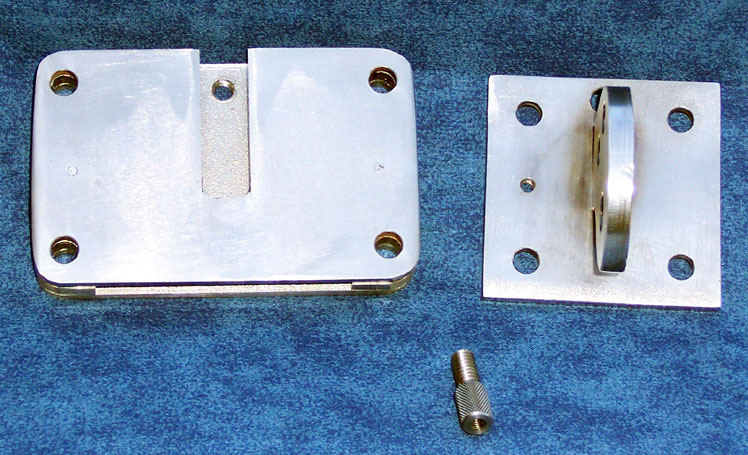
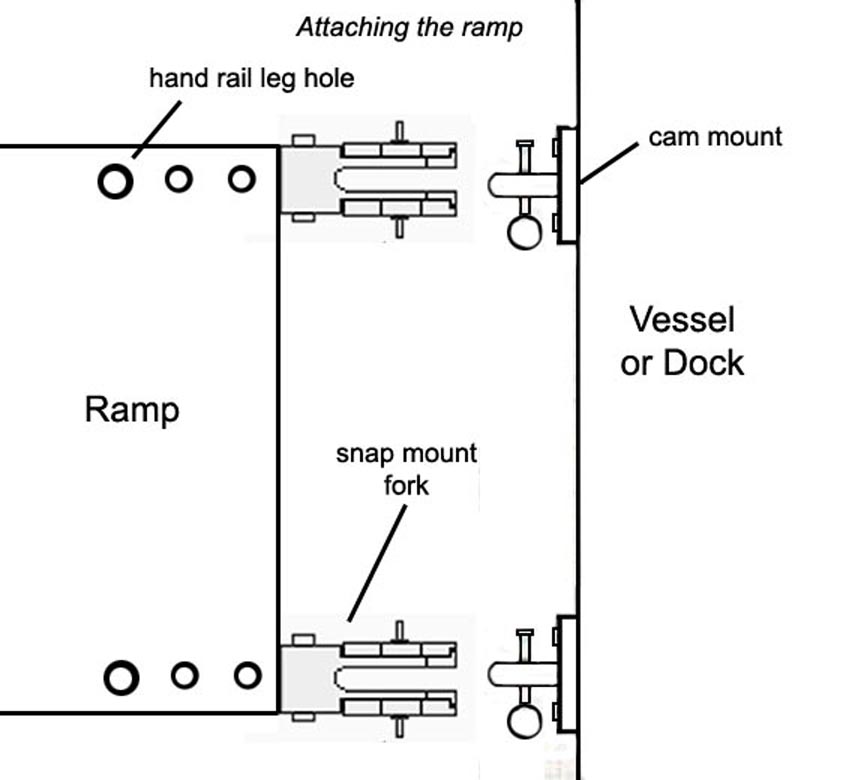
2. Mount the "Cam Mounts" (or Cam Mount with Sleeve Mount) to the ramp and hold them to the vessel mounting location(s).3. Mark the mounting bolts holes onto the vessel. If using the sleeve mounts, keep in mind that the “Cam” mount plate has to be able to slide in and out of the sleeve mount so you need 2-3/4” to 3” of open clear space above the sleeve mounts.
4. Drill the marked holes and mount the Cam Mounts (or Sleeve mounts) to the vessel using the backing plate and ¼-20 bolt set supplied or #14 stainless steel sheet metal screws. (If the bolts are too long, cut them down. If too short, replace with longer ¼-20 stainless steel bolts). Use a sealant between the Cam Mount (or Sleeve Mount) and the vessel. The space between the mounts should be 22-3/8" on center.5. Once the mounts are secured to the vessel and the bedding material has cured, you may connect the ramp to the mounts.
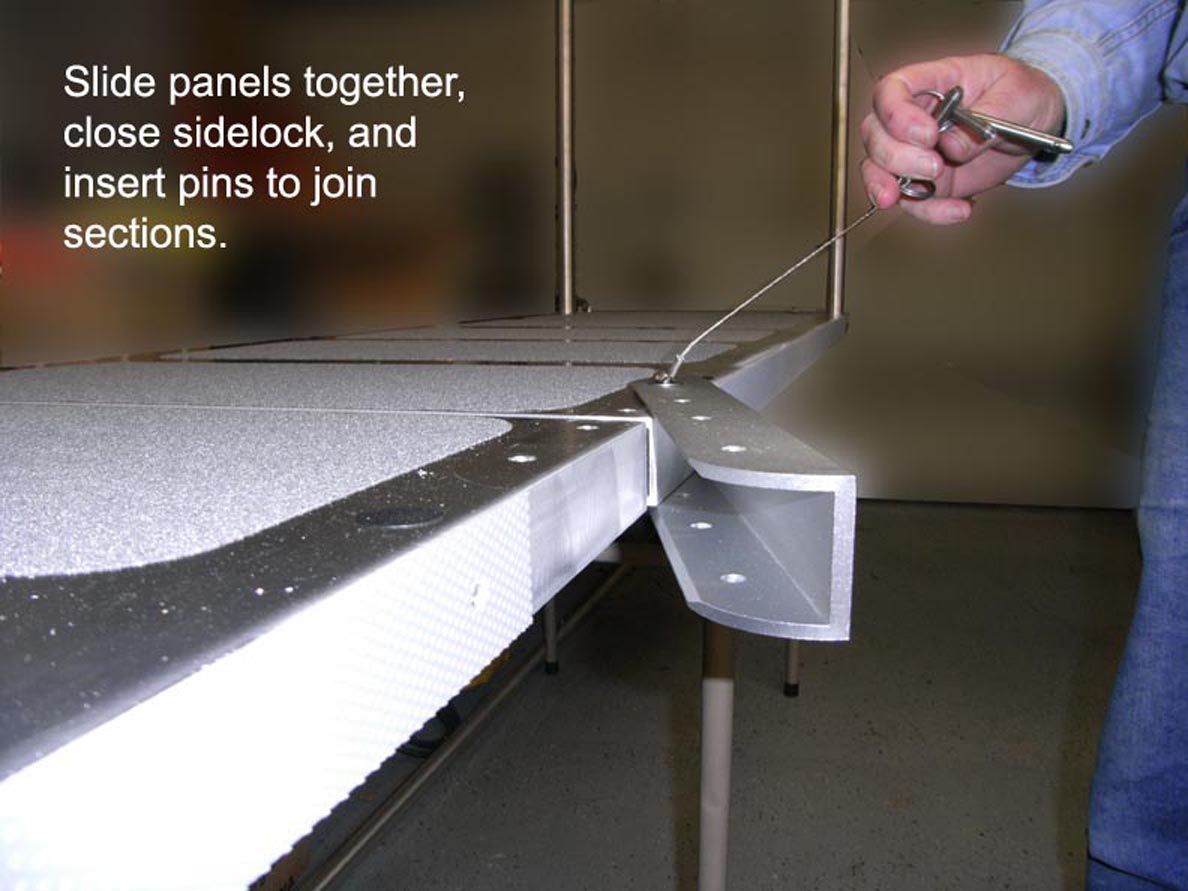
6. If your ramp has two sections, connect the section with the "Fork Mount" to the vessel first, then connect the second section of ramp to the first section with the supplied hardware.Steadi-Plank™ install and set-up on dock
1. The tips of the ramp forks with the side slide lock are designed to have the tips of the slide locks break if the non-mounted end of the ramp slides off of the support that it rests on and hits up against something or is pinned between objects. This is designed to help prevent damage to the surface that the ramp is mounted to. The side slide locks are replaceable.
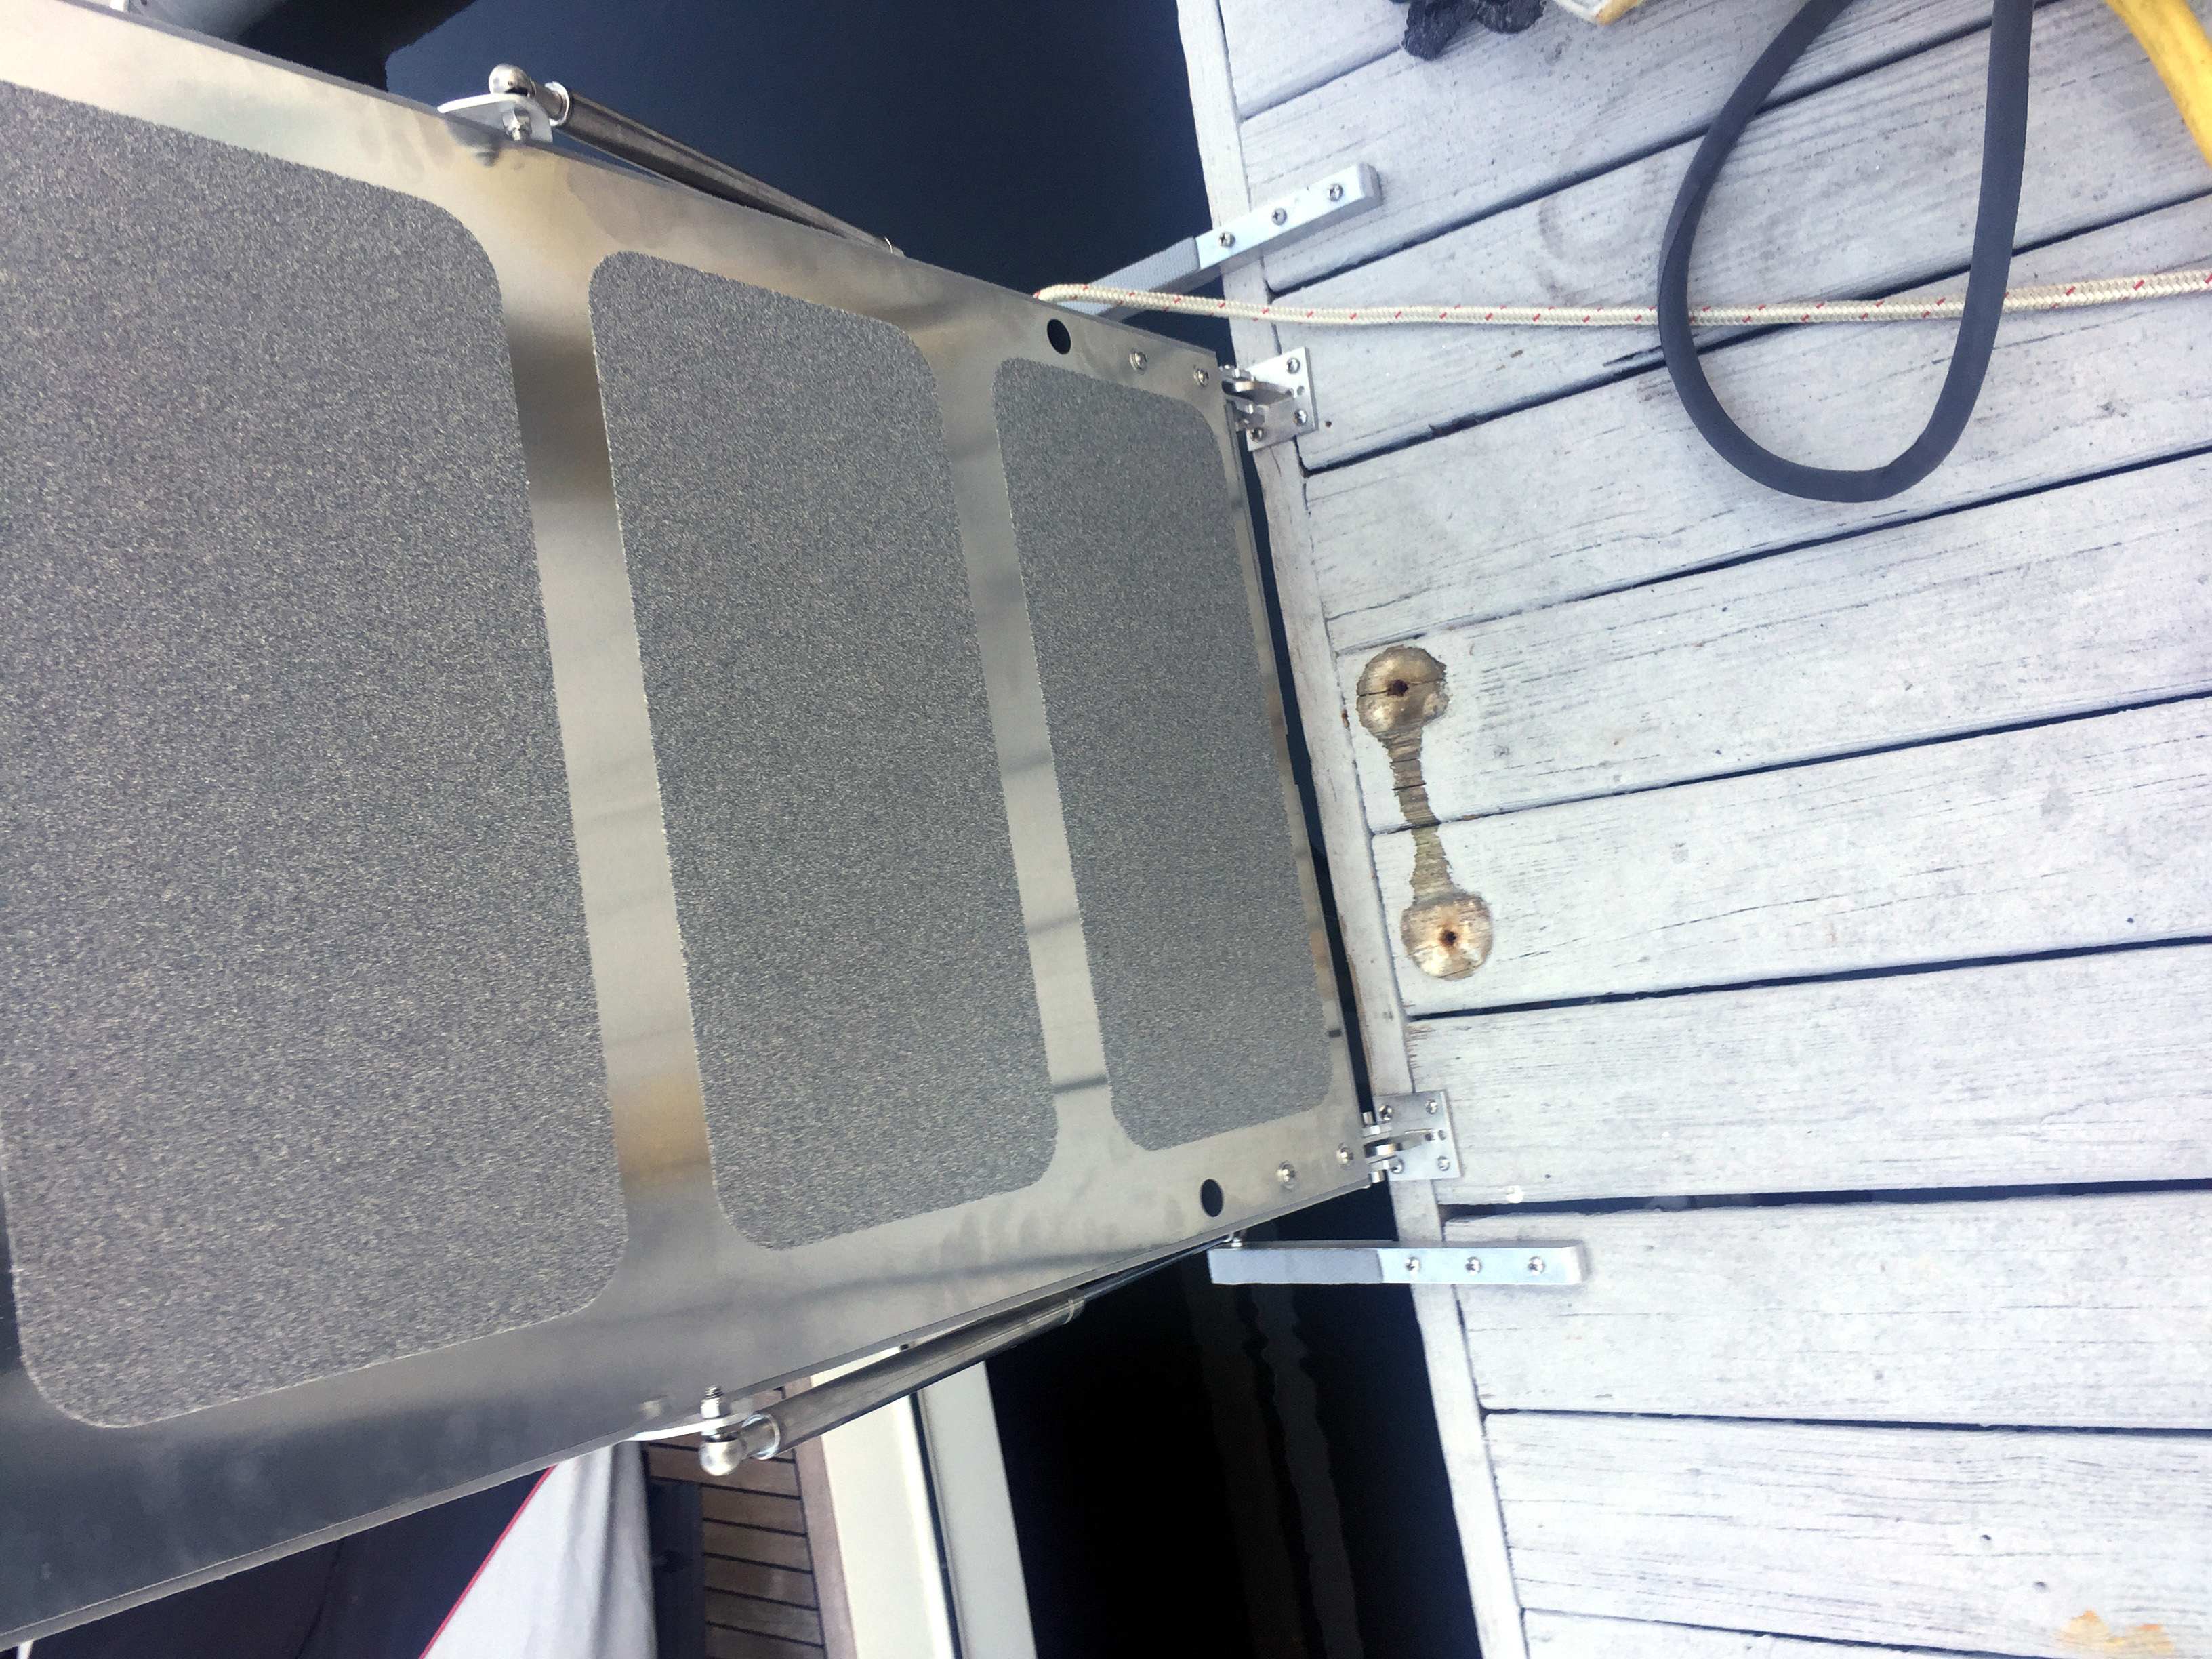
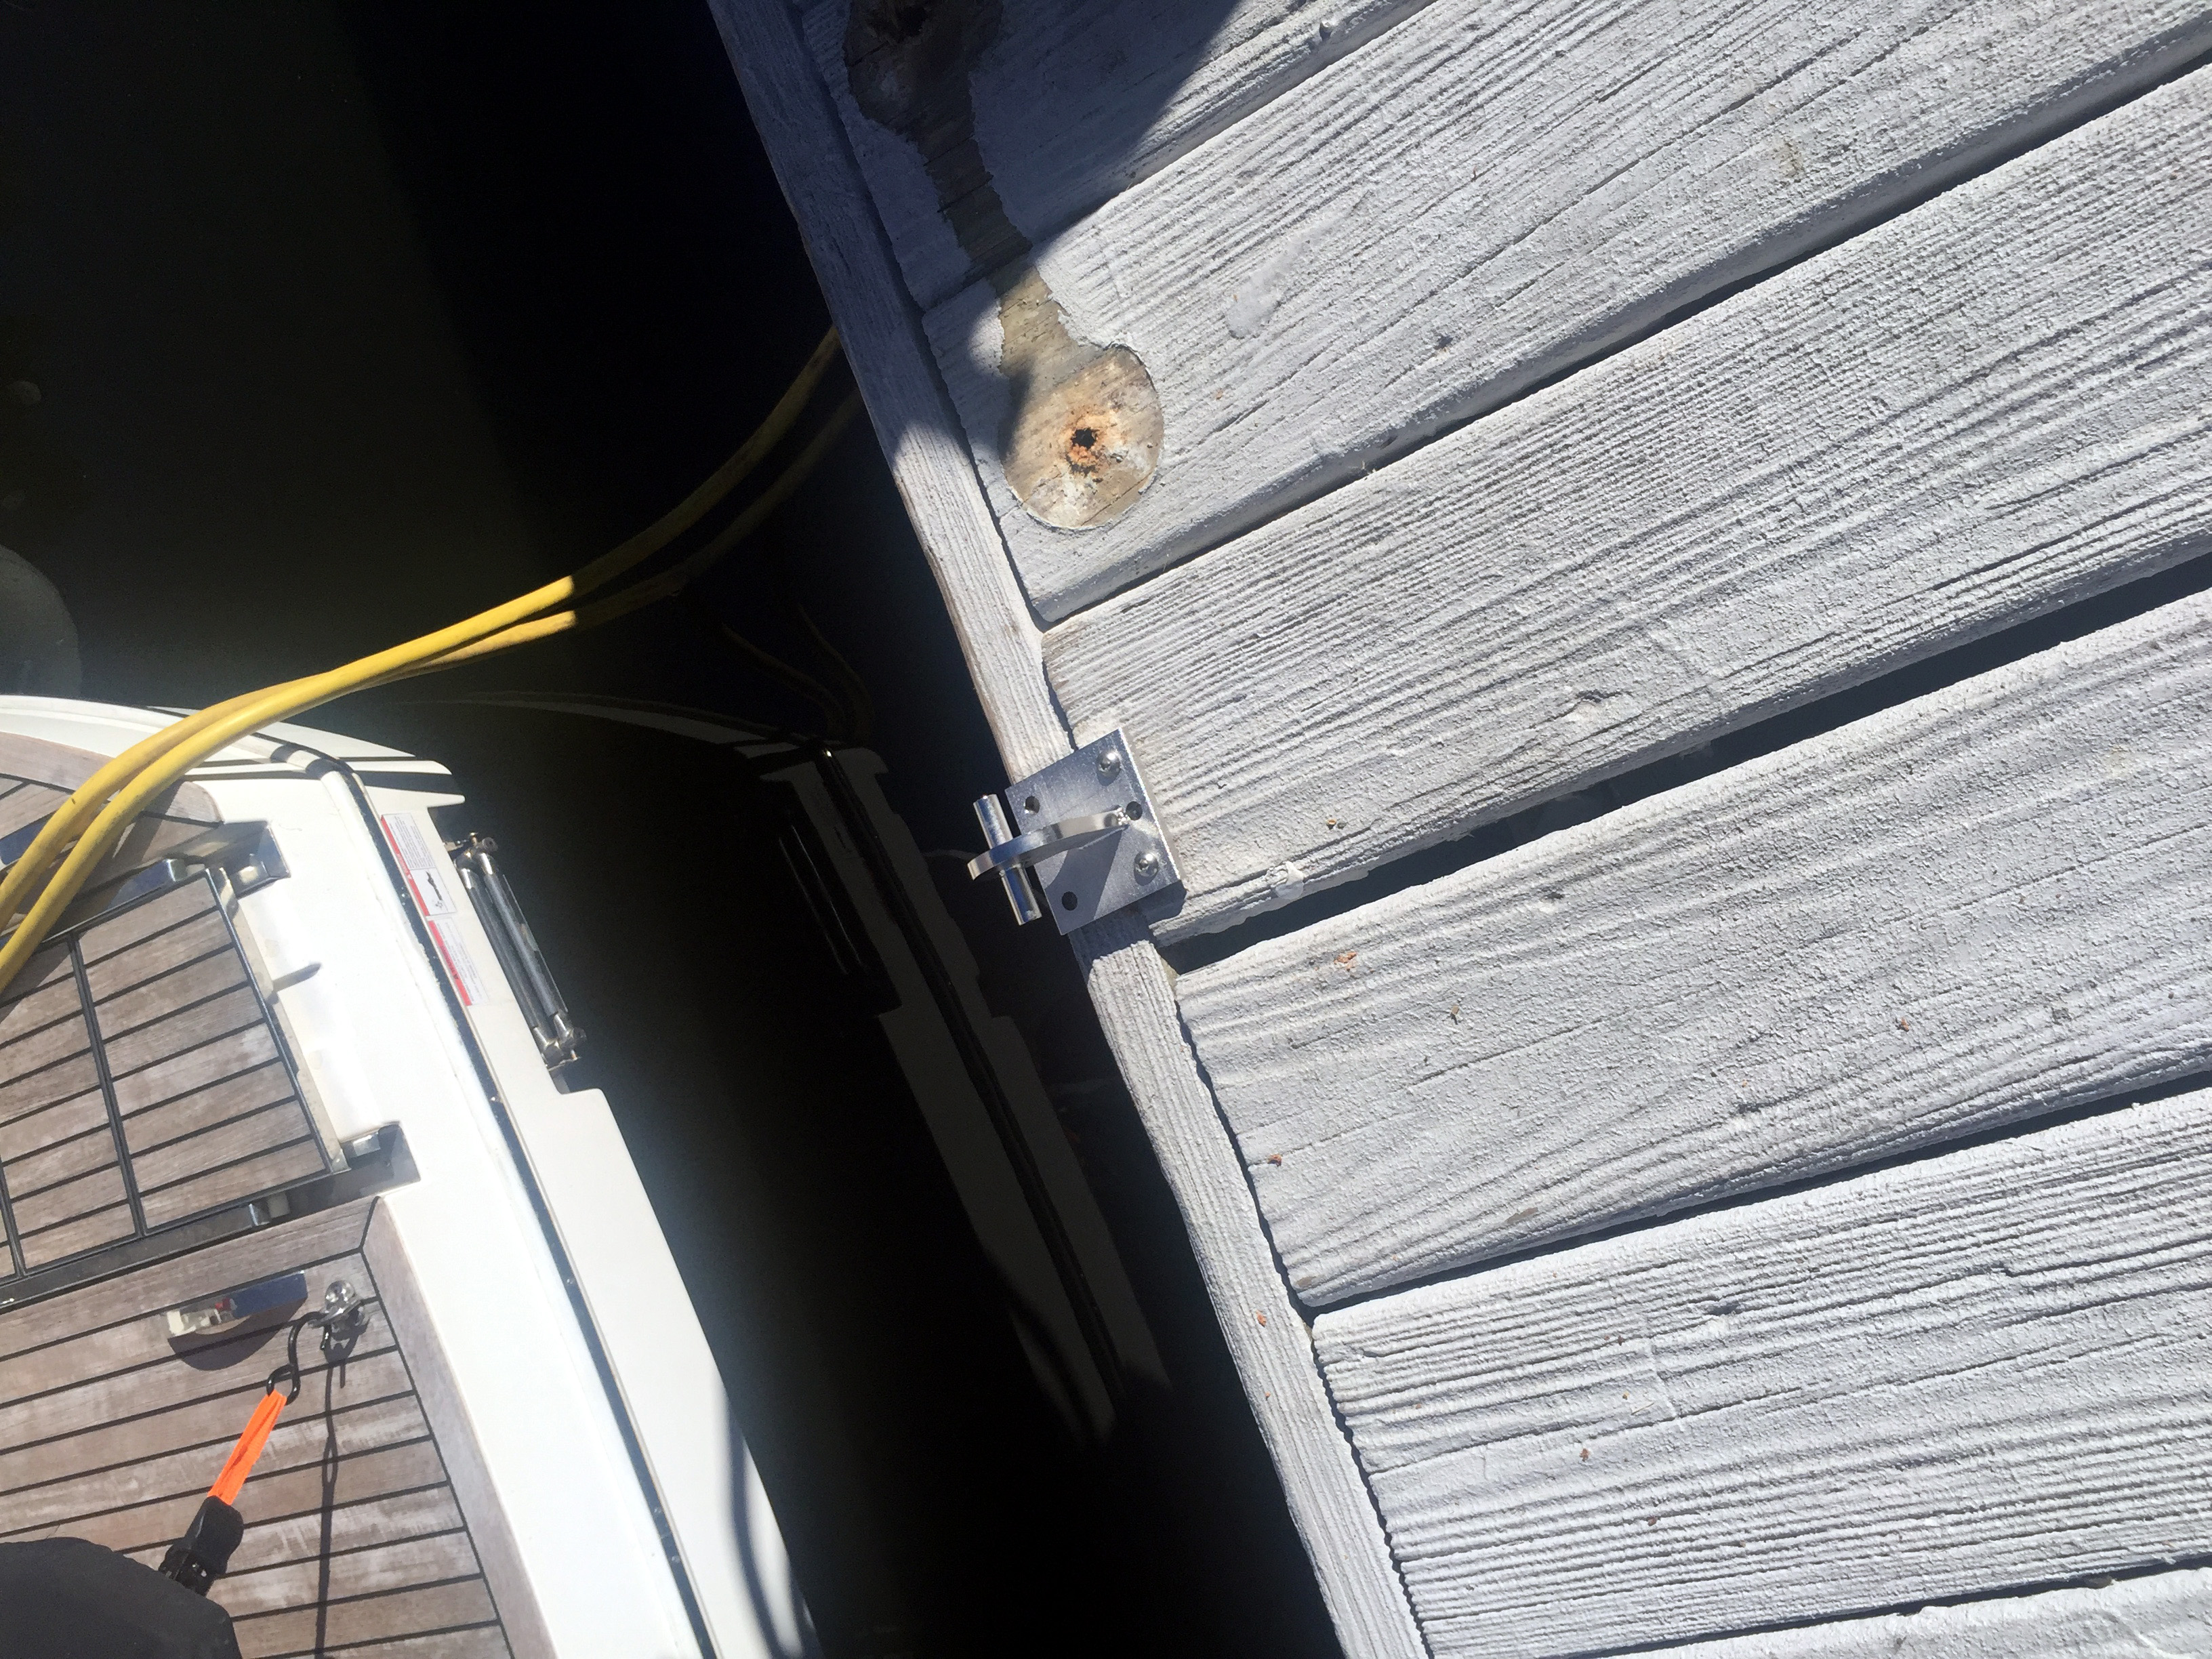
2. Mount the "Cam Mounts" (or Cam Mount with Sleeve Mount) to the ramp and hold them to the dock mounting location(s). If the ramp needs to go down lower that the surface of the dock, mount as close to the surface front edge of the dock as you can.
3. Mark the mounting bolts holes onto the dock. If using the sleeve mounts, keep in mind that the “Cam” mount plate has to be able to slide in and out of the sleeve mount so you need 2-3/4” to 3” of open clear space above the sleeve mounts.
4. Drill the marked holes and mount the Cam Mounts (or Sleeve mounts) to the dock using the backing washers and ¼-20 bolt set supplied or #14 stainless steel sheet metal screws. (If the bolts are too long, cut them down. If too short, replace with longer ¼-20 stainless steel bolts). Use a sealant between the Cam Mount (or Sleeve Mount) and the dock. The space between the mounts should be 22-3/8" on center.
5. Once the mounts are secured to the dock and the bedding material has cured, you may connect the ramp to the mounts.
6. If your ramp has two sections, connect the section with the "Fork Mount" to the dock first, then connect the second section of ramp to the first section with the supplied hardware.
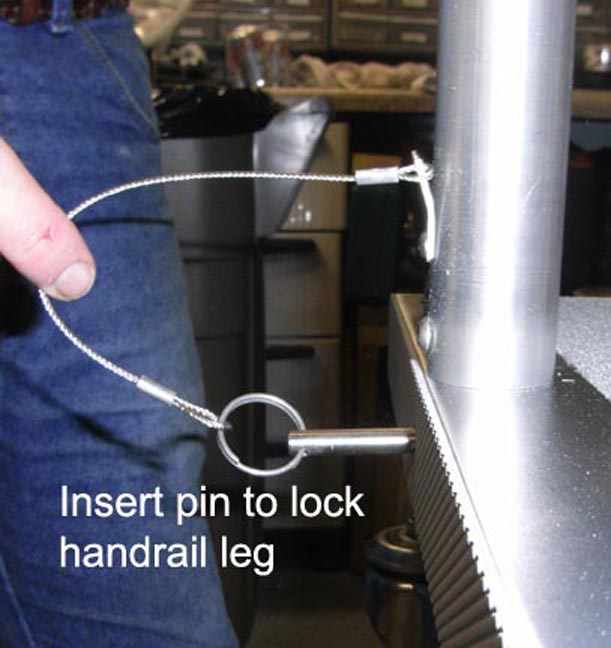
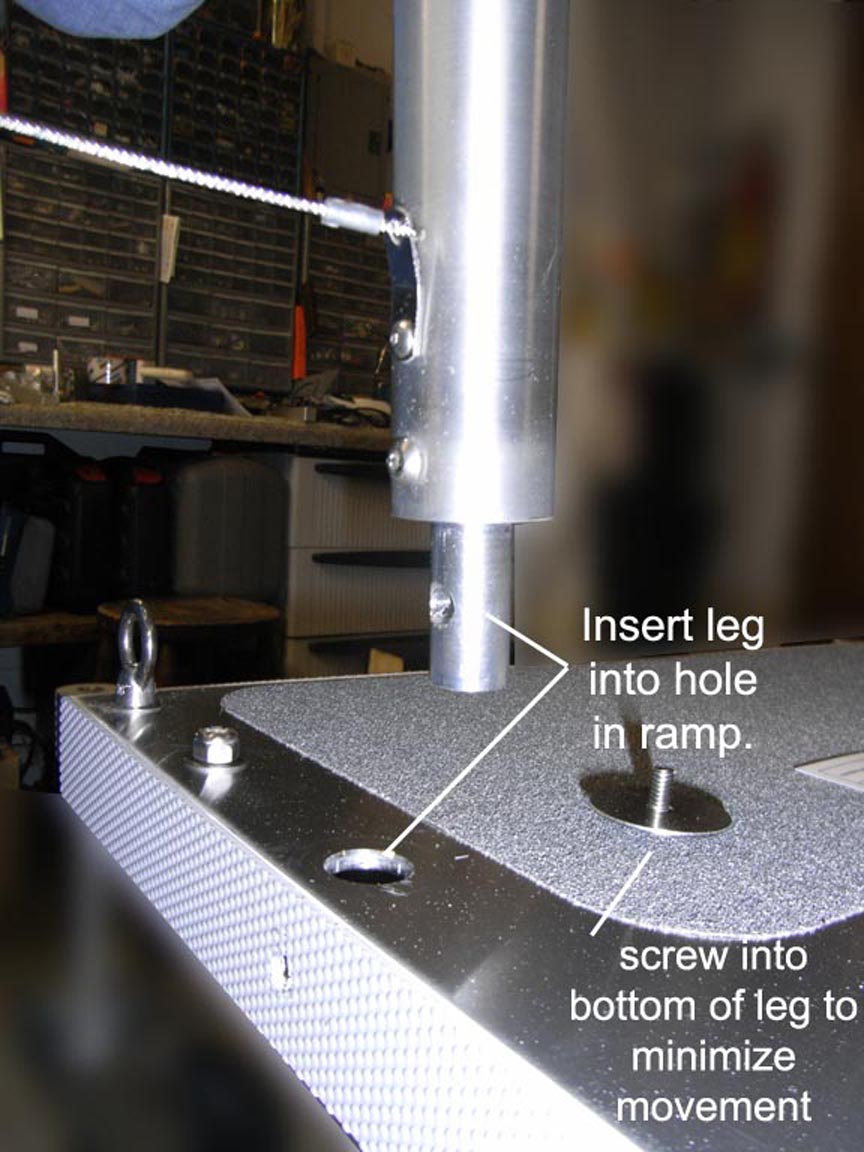
7. Once the ramp is in place, you may connect the handrail (if you purchased this option) using the supplied detent pins.
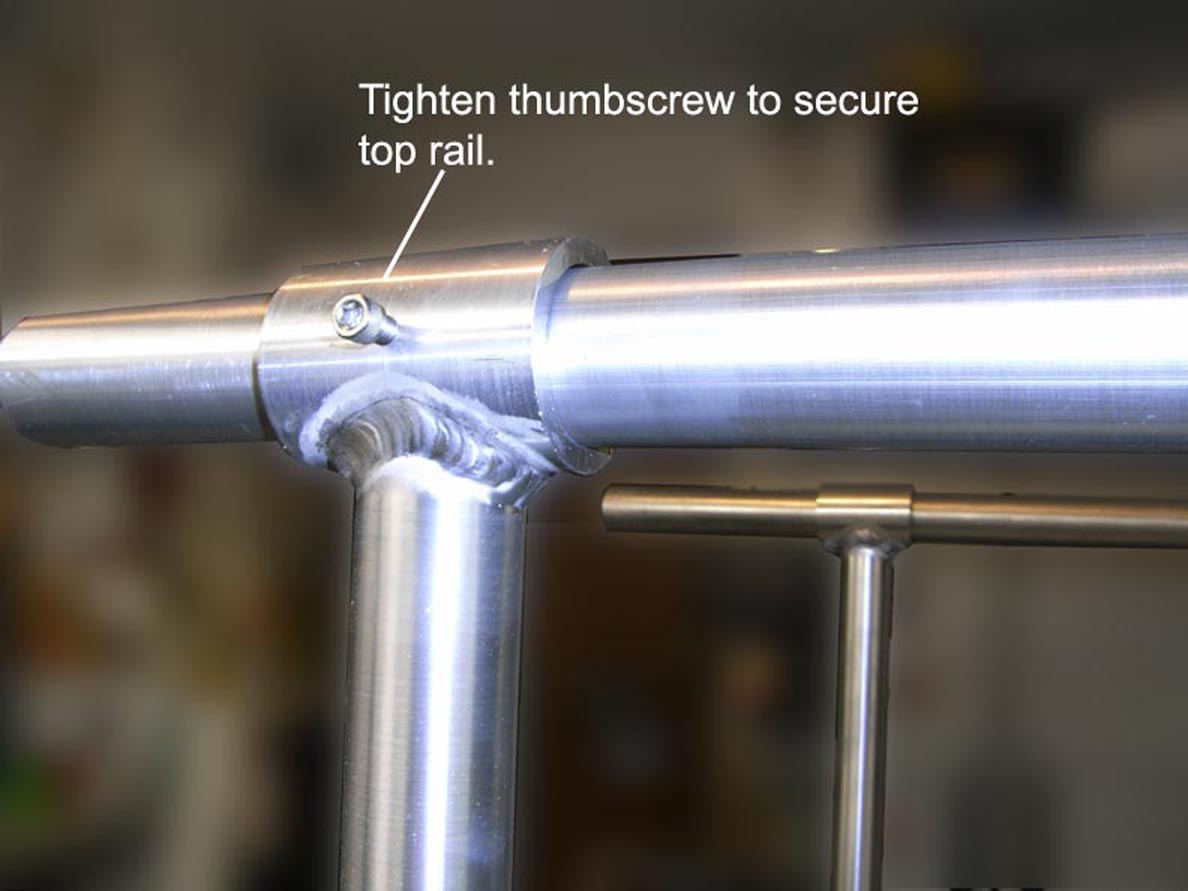
(The easiest way to mount the handrail is to put the top rail through the “T”s on the leg stanchions first then insert the leg stanchions into the ramp and secure them When installed, the handrail will have some movement to it. You can minimize the movement and stiffen the handrail up by tightening the screw at the bottom of the stanchion as much as you can.
8. Now make sure that all bolts and detent pins and made fast. Go ahead and try it.
9. We hope you enjoy using our Stead i-Plank™ Boat Boarding Ramp and that it will make your boarding easier and safer.
If you have questions, please contact us at 813-645-6666 or E-Mail us at: info@BoardingRamp.com
Mounting Bracket (Cam Mount / Sleeve Mount) Fastening Specifications.
All hardware should be bedded in quality marine sealant/adhesive and secured with four marine-grade stainless steel oval head screws. Through-bolts should be marked and drilled to 1/4". Installations using self-tapping #14 screws should have holes marked and drilled to 3/16". Using the sheet metal screws will not be as secure as the through bolts. Installations using machine screws tapped directly into steel, nickel or aluminum should be drilled to 13/64" and tapped with a # 14 machine screw tap.
To attach the gas spring to the ball stud, you must remove the safety retainer clip from the gas spring end fitting. Push the gas spring end fitting onto the ball stud and then replace the retainer clip.
You can see a video of the retainer clip remove on You Tube at:
http://www.youtube.com/watch?v=KuxEJioPkV0
Local weather or sea conditions may contribute to minor corrosion. Aluminum and stainless steel are not completely free from corrosion attack. Regular fresh water rinsing and periodic cleaning with a mild soap will help to retain luster
Our ramps are not designed to be cantilevered. They must be supported at both ends either with one of our mounting systems,or be resting on a surface or with a supporting “trapeze arrangement” that will support the weight of the ramp with several people on it.
When using our rail mount system with the 3/8” stainless steel rod, make sure that you use the stainless steel flat washer between the end ring and the cam mount to help prevent the ring from pulling thru the mount.
When using our C.A.R.S. system with our “A” frame, mount the ramp to the front edge of the dock or mounting surface. Mount the “A” frame to one side and the rear of the ramp mount location. Secure the cable end to the ramp “eye” ring. You may add or remove cable turns on the cable reel to help counter balance the ramp. You may remove one end of the ratchet latching pin spring to disengage the ratchet from operating. This will allow the ramp to move up and down freely. (Caution, doing this will also allow the ramp to move up by itself if it is pushed by the wind or wave action). The rubber ball may be positioned along the cable to provide a stop point for the ramp when being raised. If a storm is coming, please secure the ramp to prevent damage.
Our ramps are not designed to be cantilevered. They must be supported at both ends either with one of our mounting systems,or be resting on a surface or with a supporting “trapeze arrangement” that will support the wight of the ramp with several people on it.
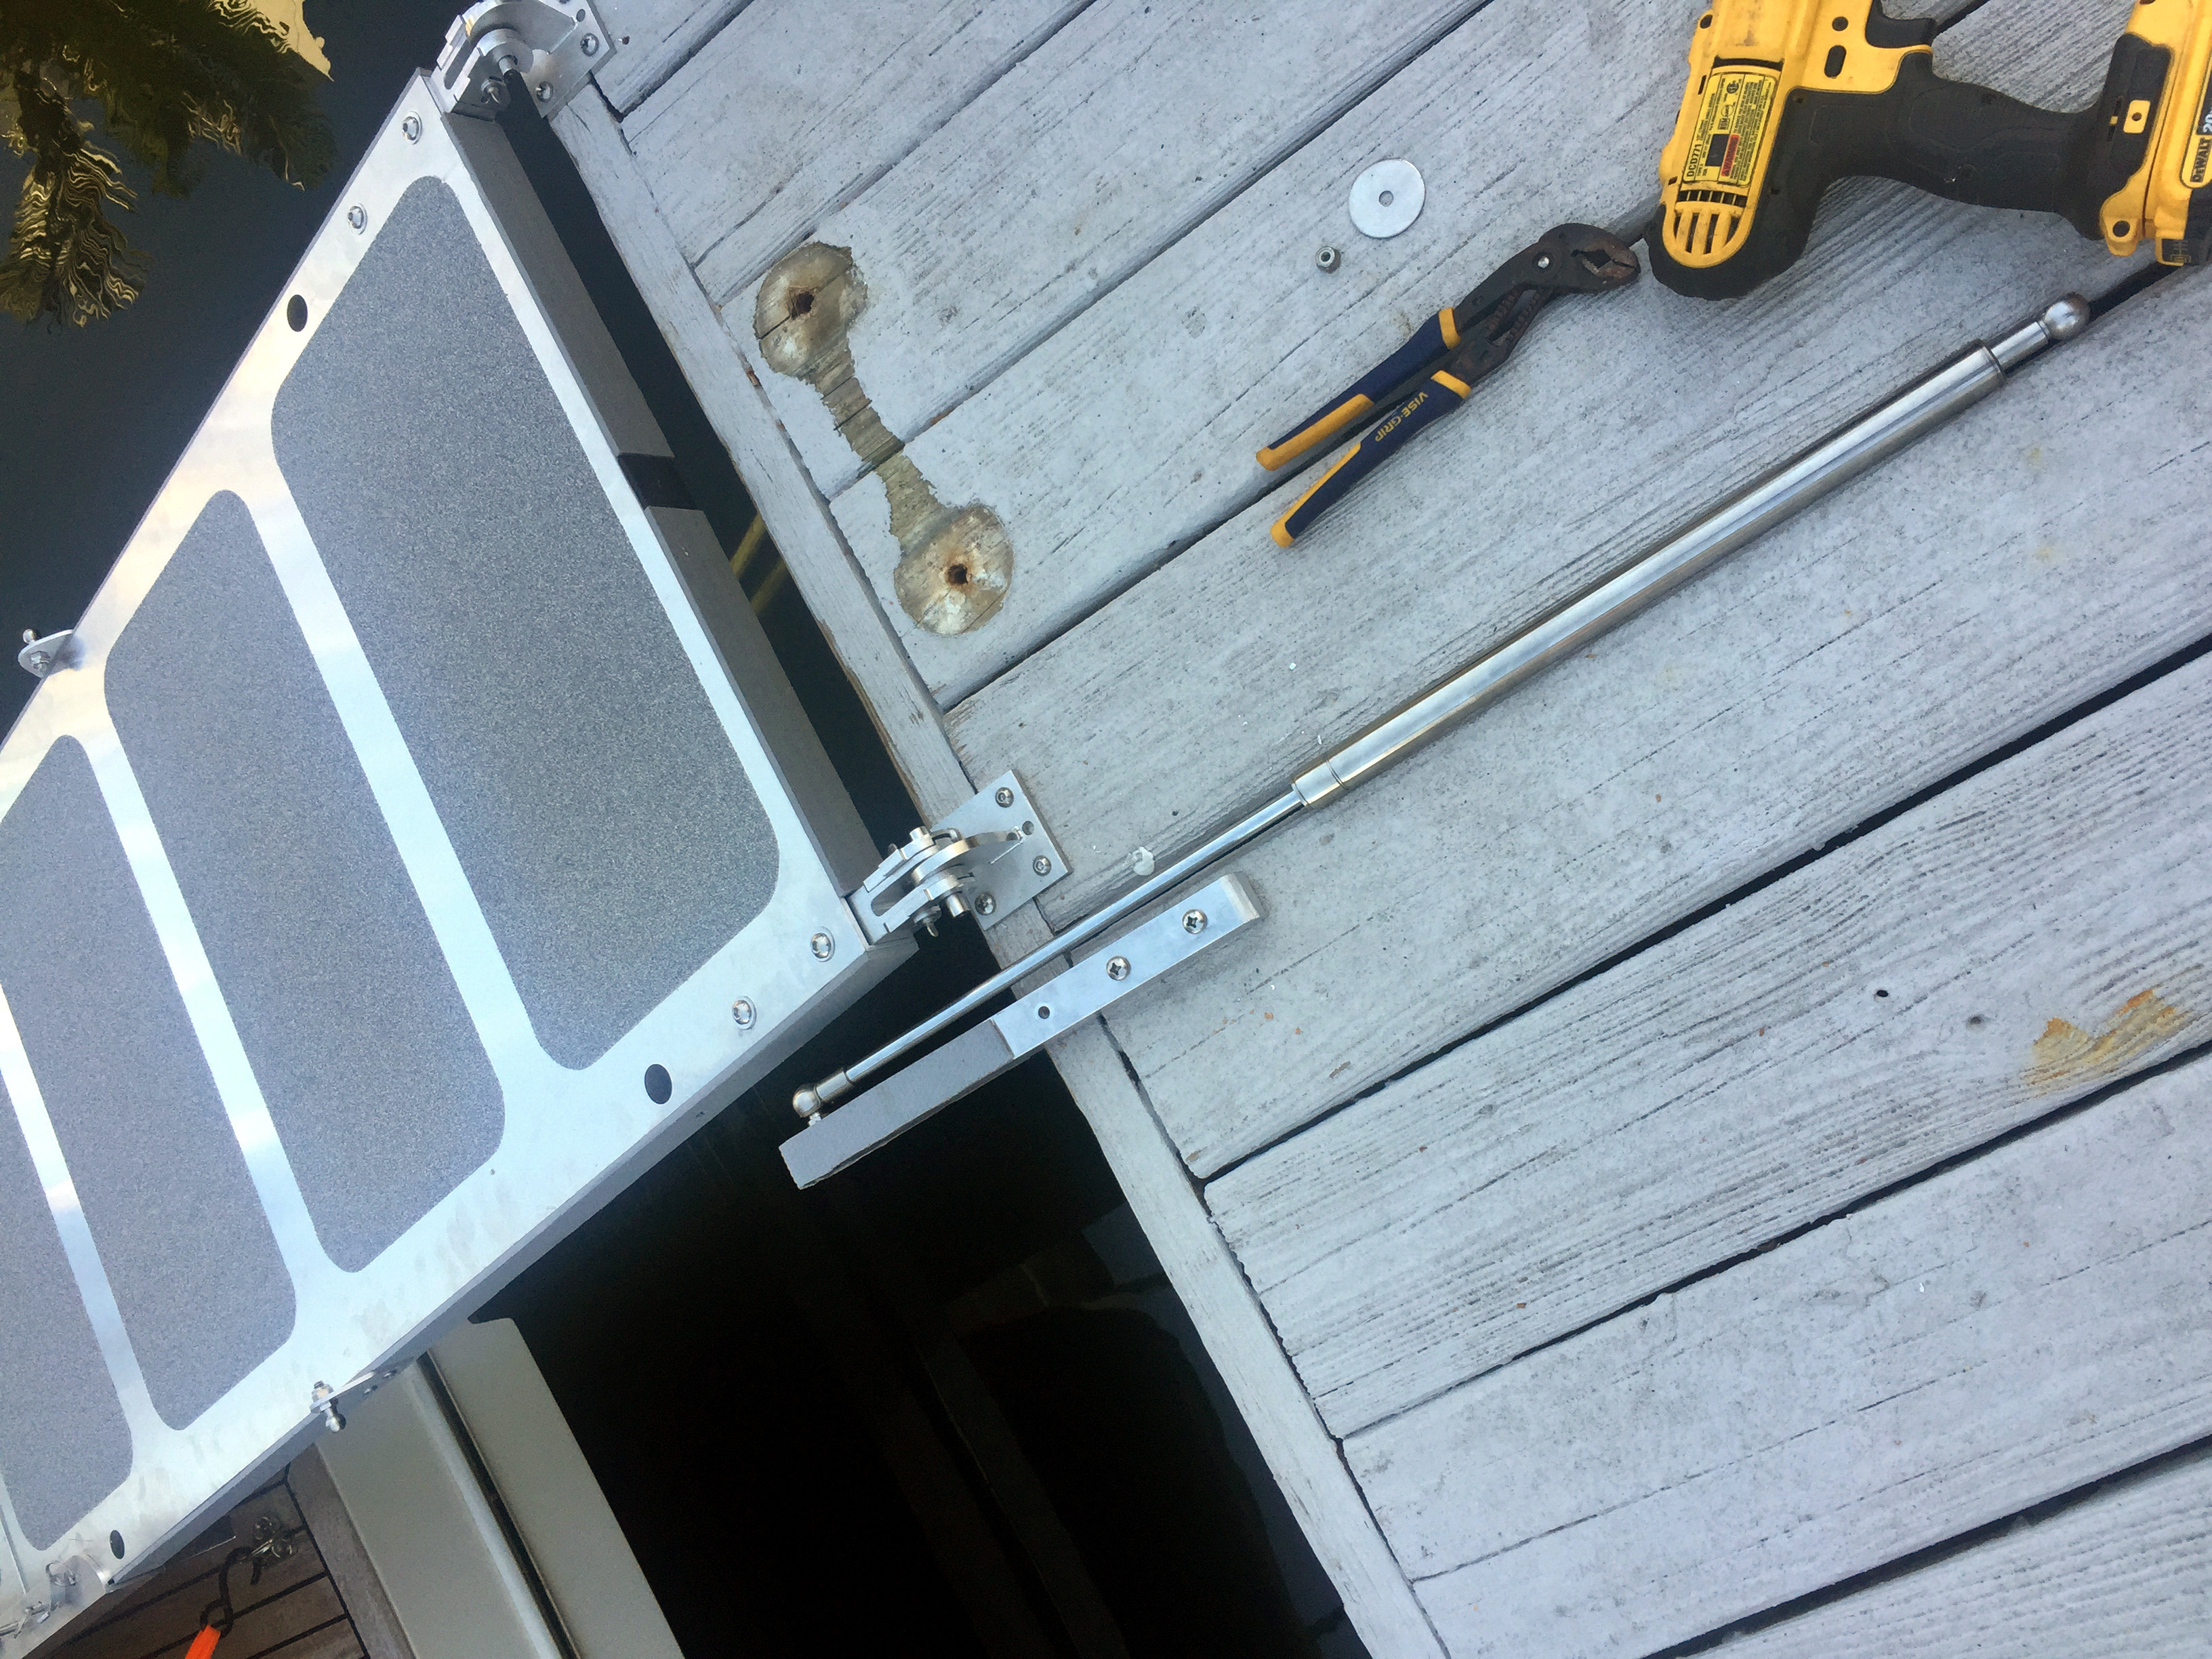
BLP-4/6 install
The “ball” mounting plate should be attached to the ramp side with the self-tapping screws. It should be about 24” from the dock end of the ramp and facing out and up from the non-skid side of the ramp. Then place the rod end of the gas strut at the front edge of the dock and about 1”-2” to the outside of the ramp. (you can just hold the ramp and strut mount in place before screwing them down to make sure that the mounting positions will allow the ramp to stand vertical the way you would want it to.) Then screw down the “cams” thumb tighten the slide locks to secure the ramp to the mounts.
(you can just hold the ramp and strut mount in place before screwing them down to make sure that the mounting positions will allow the ramp to stand vertical the way you would want it to.)
BLP-4/6 install
BLP-4/6 install
If you are installing one of our BLP-4/6 systems and using our standard mounts and want the ramp to extend down below the dock surface, the “cams” should be mounted at the front edge of the dock. Please position the ball mounts at 6” past the front edge of the dock and about 2” to the outside of the cams, screw it down.
The mounting instructions are also on our web site at:
http://www.boardingramp.com/doc/bars.htmlWe can make adaptors that will allow our mounting system to adapt to your existing ladder or ramp mounts.
Click a link below to Go to:
Standard STEADI-PLANK™ Boat Boarding Ramp Systems©
Wheelchair Accessible Boat Boarding Ramps
Boat Boarding Ramp Install & Set-Up
Boat boarding Ramp Sales Information